Advanced Raspberry Pi Projects for Your Smart Home 2026

This post may contain affiliate links. As an Amazon Associate we earn from qualifying purchases. Disclosure.
Unleash the power of Raspberry Pi in your smart home with advanced automation and monitoring projects designed to enhance your living experience.
Advanced Raspberry Pi smart home projects are an evolving trend driven by the increasing need for innovative automation and monitoring solutions. Raspberry Pi, being an affordable and versatile computing platform, has become a favorite among tech enthusiasts and DIY lovers. With Raspberry Pi, you can create an intelligent smart home tailored to your needs, offering sophisticated automation and systematic monitoring.
Bottom line: A Raspberry Pi 4 or 5 (at least 2GB, 4GB if you want headroom) running Home Assistant OS with a ZigBee USB adapter is a capable local hub for a little over $100 in hardware, though Pi prices have climbed in 2026. Use an SSD instead of an SD card for long-term reliability, and start with smart lighting and temperature sensors before adding cameras and security projects.
My own Home Assistant hub is a Raspberry Pi 5 mounted on a DIN rail in the electrical cabinet, running Home Assistant OS and fed by a 5 V Mean Well MDR-60-5 rail supply instead of a phone charger. Zigbee comes from a Home Assistant Connect ZBT-1. A Raspberry Pi 4 is still a fully supported choice, but at 2GB the official price gap to a Pi 5 is only $10, so I'd buy the newer board today.
What Hardware Is Recommended for a Pi-Based Smart Home Hub?
Before starting a project, verify your hardware matches the task:
| Component | Minimum | Recommended |
|---|---|---|
| Raspberry Pi | Pi 4 Model B (2GB RAM) | Pi 5 or Pi 4 with 4GB RAM or more |
| Storage | 32GB A2 microSD card | USB SSD (or NVMe on a Pi 5) instead of an SD card |
| ZigBee coordinator | Sonoff ZBDongle-P or ZBDongle-E | Home Assistant Connect ZBT-2, or ConBee III |
| Power supply | Official Pi 4 USB-C PSU (5.1V 3A) | Pi 5: official 27W USB-C PSU (5V 5A) |
| Case | Any vented case | DIN rail case, or an active-cooling case |
The standards body publishes the details at ZigBee Alliance official standards.
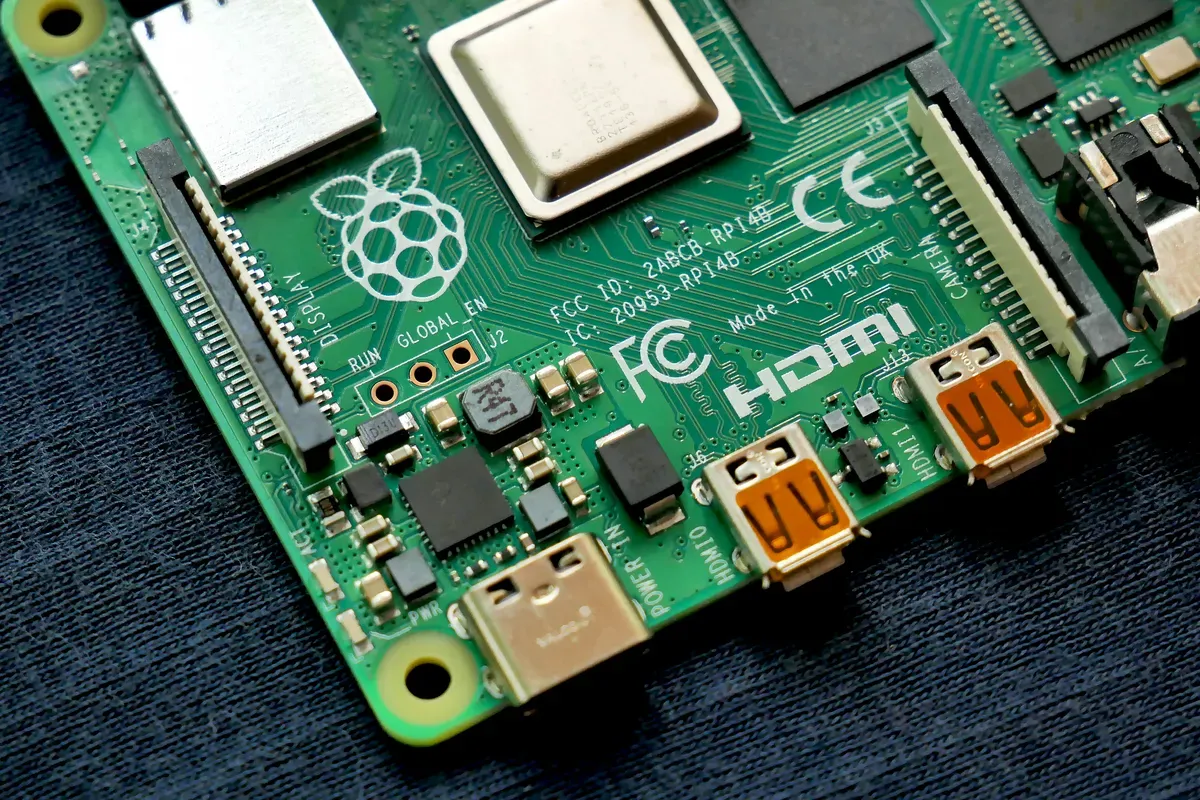
Home Assistant's installation guide lists the Raspberry Pi 4 and Raspberry Pi 5 for Home Assistant OS, with at least 2GB of RAM, and asks for a microSD card of 32GB or more rated A2. The Pi 3 is no longer on that list. It only appears for the Container install, which skips apps and the Supervisor. Since the October 1, 2026 price rise, a 2GB Pi 4 costs $67.50 and a 2GB Pi 5 costs $77.50 (Raspberry Pi's own announcement), so the Pi 5 premium is small. A Z-Wave controller is a separate stick, so older combo sticks like the HUSBZB-1 are no longer the sensible way to get both radios.
How Do You Install Home Assistant OS on a Raspberry Pi?
Home Assistant OS is the recommended installation method. It runs on a minimal Linux kernel and manages updates, apps, and backups through the Home Assistant interface.
- Download the Raspberry Pi Imager from the official Raspberry Pi site
- In the Imager, pick "OS", then "Other specific-purpose OS", then "Home automation", then "Home Assistant", and choose the image for your board (Pi 4 or Pi 5)
- Select your SD card or SSD, then click "Write"
- Insert the card into your Pi, connect Ethernet (required for initial setup), and power on
- Open a browser on any device on the same network and go to
http://homeassistant.local. If that doesn't load, tryhttp://homeassistant.local:8123. Home Assistant's guide says the interface should appear within about a minute and to wait up to 5 minutes before suspecting a bad write - Complete the onboarding wizard: create your account, set your location, and let Home Assistant discover devices on your network
After onboarding, plug in your ZigBee USB dongle. In Home Assistant, go to Settings > Devices and Services > Add Integration and search for "ZHA" (Zigbee Home Automation). If you prefer MQTT-based control, install the Zigbee2MQTT app instead. Select the correct USB port for your dongle (usually /dev/ttyUSB0 or /dev/ttyACM0). Zigbee2MQTT is installed as an app (called an add-on before Home Assistant 2026.2) and needs an MQTT broker, with Mosquitto as its recommended choice.
What Is the Power of Raspberry Pi in Smart Home Automation?
Raspberry Pi is more than just a mini-computer; it's a gateway to advanced home automation. By integrating a Raspberry Pi into your smart home system, you can control various IoT devices easily. These projects allow homeowners to manage everything from lighting to home security, all from a unified platform.
With automation, you can effortlessly manage devices with ease. The Raspberry Pi can connect with other smart home devices through popular protocols like ZigBee, Z-Wave, and Bluetooth. Imagine controlling your Philips Hue light bulbs effortlessly or managing your smart thermostat from anywhere in the world. The possibilities are endless with a Pi.
Popular Automation Projects
Among the myriad of projects, some is notable due to their utility and popularity:
- Smart Lighting Solutions: Automate lighting with motion sensors and set schedules to reduce energy consumption. Wi-Fi fixtures such as a Govee ceiling light or a LIFX A21 bulb can also be scene-controlled from Home Assistant. LIFX has a local-network integration, and Govee lights need the LAN Control toggle enabled in the Govee Home app (not every model has it).
- Temperature and Humidity Control: Manage your home's environment using connected sensors, ensuring comfort and energy efficiency. Use smart plugs like the Tapo P105 Mini Plug, which Home Assistant supports through its TP-Link Smart Home integration (setup asks for your TP-Link cloud login), to schedule portable heaters and fans based on sensor data.
- Voice-Controlled Assistants: Integrate Raspberry Pi with voice assistants like Google Assistant or Amazon Alexa for hands-free control.
These projects not only make life convenient but also contribute to a green living lifestyle by optimizing energy use.
How Do You Use Advanced Monitoring for Enhanced Security?
Monitoring is an integral part of any smart home setup. With Raspberry Pi, you can implement advanced monitoring systems to enhance home security and efficiency. By using Raspberry Pi's processing power, you can develop DIY solutions for keeping an eye on your home when you're not around.
Implementing Smart Monitoring
Utilize Raspberry Pi's capabilities to create a capable monitoring system:
- Surveillance Cameras: Set up Pi-controlled cameras for reliable home surveillance.
- Environmental Sensors: Monitor water leaks, smoke, or unusual motion within the home environment.
- Security System Integration: Combine with existing systems to create an enhanced safety net.
Advanced Raspberry Pi smart home projects often incorporate these solutions, ensuring your home remains protected and functioning optimally.
Why Choose Raspberry Pi for Smart Home Solutions?
Choosing Raspberry Pi for your smart home projects comes with distinct advantages. First, it's cost-effective, making it accessible for extensive projects without breaking the bank. Additionally, the open-source nature of Raspberry Pi ensures there's a wealth of community-supported software and documentation available. This means plenty of pre-built applications and forums are at your disposal, ready to assist in troubleshooting and innovation.
Embrace Innovation and Creativity
Engaging in advanced Raspberry Pi projects offers a unique opportunity to blend creativity with technology. It invites you to think outside the box, promoting a deeper understanding of IoT devices and smart solutions. With community support, you can tackle sophisticated setups with minimal hassle.
How Do You Start Your Raspberry Pi Smart Home Journey?
To start on the journey with Raspberry Pi, start small and build your way up. Understand your home's specific needs and design projects that meet those requirements. Whether it's automating everyday tasks or setting up comprehensive monitoring systems, Raspberry Pi is your ally in achieving a fully automated and secured smart home.
Advanced Raspberry Pi smart home projects offer a wide spectrum of possibilities, promising to transform how we live. By using Raspberry Pi's capabilities, you can enhance comfort, increase energy efficiency, and ensure safety within your home environment. Embrace the future of home automation and monitoring, and let your creativity shine.
Start on your Raspberry Pi smart home journey today and experience the endless capabilities of creating a tech-savvy, automated living space. Your custom automation framework remains flexible and adaptable as your needs evolve. Rather than being locked into proprietary ecosystems, Raspberry Pi-based projects give you complete control over your smart home's future, making it a future-proof investment.
The investment you make in learning Raspberry Pi automation skills today will pay dividends for years to come. As new smart home devices become available and your household needs change, your existing setup can easily accommodate new technologies. This flexibility represents a significant advantage over inflexible commercial systems. You maintain ownership and control while enjoying advanced automation capabilities that rival enterprise-grade solutions.
Common Raspberry Pi questions
Can I run Home Assistant on a Raspberry Pi 3?
Not with Home Assistant OS, at least not officially. Home Assistant's Raspberry Pi installation page covers only the Pi 4 and Pi 5, and its installation overview lists the Pi 3 only for the Container install method. A Pi 3 can still run Home Assistant Container, but you give up apps and the Supervisor, so for a new build start with a Pi 4 or Pi 5 with at least 2GB of RAM.
Should I use an SD card or SSD for Home Assistant?
An SD card works for getting started but is not ideal for long-term reliability. Home Assistant writes to storage frequently (database updates, log files), and microSD cards wear out under continuous writes. Home Assistant's guide asks for an A2-rated card of 32GB or more if you do use one. A USB-attached SSD such as the Samsung T7, or an NVMe drive on a Pi 5, is the sturdier long-term choice and tends to feel faster.
What is the difference between ZHA and Zigbee2MQTT?
Both integrate ZigBee devices into Home Assistant, but they work differently. ZHA (Zigbee Home Automation) is the built-in Home Assistant integration - simpler to set up, no additional software required, and tightly integrated into the Home Assistant UI. Zigbee2MQTT runs as a separate app that talks through an MQTT broker, and its supported-devices list is broader with more exposed device attributes. Experienced users often prefer Zigbee2MQTT for its flexibility; beginners should start with ZHA.
Does the Raspberry Pi need to stay on 24 hours a day?
Yes, for a home automation hub. Home Assistant must be running continuously to process automations, handle device triggers, and maintain device state. Published idle measurements for a Pi 4 or Pi 5 land around 3W, and a loaded hub might pull 5W. At the U.S. average residential rate of 18.31 cents per kWh (EIA, July 2026), 5W running all month costs about 65 cents.
Want the deep technical details? Check ZigBee specification and documentation. For hardware pinouts, HAT compatibility, and OS configuration details, the official Raspberry Pi documentation is the definitive reference for all board generations.
What Quick Tips Help with Raspberry Pi Smart Home Success?
Keep your Raspberry Pi cool with adequate ventilation or an active cooling case. Use the official power supply for your board (5V/3A for the Pi 4, the 27W 5V/5A unit for the Pi 5) to avoid under-voltage warnings that cause instability. Schedule automatic backups of your Home Assistant configuration to a network share or cloud storage, protecting months of automation work. Join the Home Assistant community forums at community.home-assistant.io for troubleshooting help and automation inspiration from thousands of experienced users worldwide.
Frequently Asked Questions
What can I do with a Raspberry Pi smart home setup?
A Raspberry Pi running Home Assistant can control smart lights, thermostats, locks, and cameras. Advanced projects include DIY security camera systems with motion detection, whole-home energy monitoring using smart circuit breakers, custom LED lighting controllers, environmental monitoring with temperature and humidity sensors, and automated garden irrigation systems.
Which Raspberry Pi model is best for Home Assistant?
Home Assistant's own installation guide supports the Raspberry Pi 4 and Raspberry Pi 5 for Home Assistant OS, with at least 2GB of RAM. Pick 4GB or more if you plan to run several apps (formerly add-ons) or camera software next to Home Assistant. The Pi 5 is the faster board, and at 2GB the official price gap to a Pi 4 is $10. Use an A2 microSD card of 32GB or more, or better, an SSD.
How much does a Raspberry Pi smart home hub cost?
Expect to spend a little over $100. Raspberry Pi raised prices several times because of memory costs. As of October 1, 2026, the official price of a 2GB Pi 4 is $67.50 and a 2GB Pi 5 is $77.50, and 4GB and 8GB boards cost more. A Sonoff Zigbee USB dongle lists at $24.90 on Sonoff's store, so board plus dongle already lands near $92 before the power supply, storage, and case. Check current prices before you budget.
Can a Raspberry Pi handle security cameras?
A Pi can show live camera streams in Home Assistant, but AI object detection is a different load. Frigate's hardware documentation names the Raspberry Pi 5 only together with a Hailo accelerator, and it warns that single-board computers vary in processing power, which can limit total frames per second. It also says Google's Coral is no longer recommended for new installs. For more than a couple of cameras, plan on an accelerator or a stronger machine, and record to an SSD instead of an SD card.
What Zigbee coordinator works best with Raspberry Pi?
The Sonoff Zigbee 3.0 USB Dongle Plus is a popular, low-cost coordinator and works with both ZHA and Zigbee2MQTT. The ZBDongle-P uses a Texas Instruments CC2652P chip, and the ZBDongle-E uses a Silicon Labs EFR32MG21. Sonoff lists both at $24.90. Home Assistant's ZHA page now recommends its own Home Assistant Connect ZBT-2 ($49 or 45 EUR) for new Zigbee networks. The older ZBT-1 (formerly SkyConnect) is discontinued but still supported.
Sources & References
- Home Assistant - Raspberry Pi installation home-assistant.io
- Home Assistant - Zigbee Home Automation home-assistant.io
- Home Assistant - MQTT home-assistant.io