Setting Up Your Smart Home - A Complete Step-by-Step Guide
This post may contain affiliate links. As an Amazon Associate we earn from qualifying purchases. Disclosure.
Setting up a smart home is easier when you have a plan. This step-by-step guide walks you through picking a hub, adding devices, and creating your first automations.
Creating a smart home is not only about embracing the newest technology but enhancing the convenience and efficiency of your daily life. Whether you want to control your lighting with a voice command or secure your home with advanced monitoring systems, setting up a smart home can provide numerous benefits. This guide will walk you through the process step-by-step, ensuring that your home is ready for the future.
Bottom line: Set up your smart home by first choosing an ecosystem (Alexa, Google, or HomeKit), then buying a smart speaker as your hub. Add 2-3 devices like smart bulbs and plugs, connect them via their apps, and create automated routines. A basic setup costs $75-150 and takes an afternoon to install.
How Do You Research Your Smart Home Needs?
Before diving into purchases, assess what you want from your smart home. Are you looking for energy efficiency, improved security, or simply some fun gadgets to play with? Defining your needs allows you to choose the right devices and plan your smart home setup accordingly.
The full standard lives at Home Assistant official documentation if you want to read the primary source.
Considerations for Your Smart Home
- Budget: Determine how much you are willing to invest.
- Ecosystem: Decide on a platform; Google Assistant and Amazon Echo are popular choices.
- Devices: Consider the types of devices that interest you, such as smart lighting, sensors, or voice assistants.
- Integration: Ensure your devices can work together easily.
How Do You Select the Right Smart Devices?
When it comes to smart devices, the market is replete with options. Here's what you should consider when choosing the right devices for your home:
- Smart Hubs: A smart hub orchestrates the communication between devices. Products like the Amazon Echo and Google Assistant are notable examples.
- Voice Assistants: Integrate Alexa or Google Assistant to control your devices with your voice.
- Smart Lighting: Use smart bulbs to control the ambiance and energy consumption.
- Home Monitoring: Install cameras and sensors for comprehensive security.
- Smart Plugs: Easily convert traditional appliances into smart devices with these handy plugs.
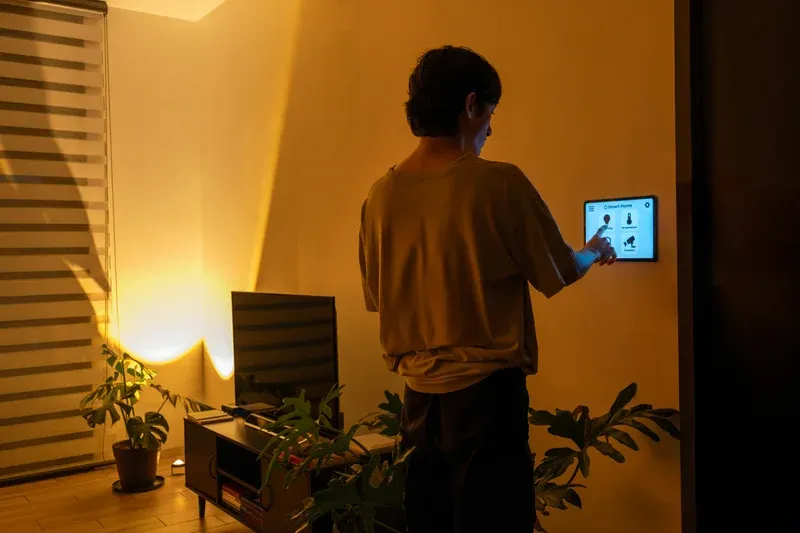
How Do You Install and Configure Smart Home Devices?
After selecting your devices, the next step is installation and configuration. Usually, this requires downloading specific apps and following setup instructions. Here's how you proceed:
Step-by-Step Installation
- Read the Manuals: Always start by reading the provided manuals for each device.
- Network Setup: Connect your devices to your home Wi-Fi network.
- App Configuration: Use the app for each device to complete setup and customization.
- Voice Assistance: Link your Amazon Echo or Google Assistant to your devices for effortless control.
How Do You Start Automating Your Home?
Automation is the essence of a futuristic smart home. By utilizing sensors and timers, your home can run by itself, improving energy efficiency and convenience.
Create Smart Routines
- Lighting Schedules: Automate lights to follow your daily routine.
- Security Protocols: Set up motion sensors to alert you of unusual movements.
- Energy Saving: Automate heating or cooling to turn off when you're not home.
- Voice Commands: Create custom commands to activate multiple devices simultaneously.
How Do You Get the Most from Your Smart Environment?
Once your smart home is fully operational, you can enjoy the convenience and modernization it brings. From controlling your smart lighting to receiving real-time home security updates, living in a smart environment drastically changes your lifestyle for the better.
Further Enhancements
- Continual Upgrades: Stay updated with the latest devices and enhancements. Budget-friendly additions like the Tapo Smart Multicolor Bulb, Tapo Smart Light Bulb L535E, Govee Glide Wall Light, or Govee Glide Lively RGBIC Wall Lights can add accent lighting to any room without significant investment. The eufy Indoor Cam E220 provides affordable 2K indoor monitoring, while the eufyCam 2C Pro delivers wireless outdoor security with local storage.
- Routine Adjustments: As your needs change, adjust your automated routines. Consider adding a Govee Smart Tower Fan for app-controlled cooling or a Govee Smart Air Purifier 2 Pro for healthier indoor air quality.
- Explore More Apps: Discover new apps that can expand the functionality of your smart devices. The Govee RGBIC Outdoor Neon Rope Light and Govee RGBIC LED Permanent Outdoor Lights extend your smart lighting to outdoor spaces for garden accents and security illumination.
For wireless device setup, learning to set up Home Assistant gives you local control without relying on cloud services. Additionally, managing your home security becomes easier when all your smart security devices connect through a centralized automation hub.
Setting up your smart home can seem daunting at first, but by following this step-by-step full guide, you'll find it a rewarding and transformative experience. Embrace technology and enjoy the era of home automation with complete control and security at your fingertips. Welcome to the future!
As your smart home matures, you will discover that the real value lies in how devices work together rather than individually. Coordinated routines that adjust lighting, temperature, and security based on time of day or occupancy patterns create an environment that anticipates your needs without manual intervention. Taking the time to refine these automations over the first few weeks ensures that your system truly reflects your household habits and delivers meaningful daily convenience.
Documenting your device names, network credentials, and automation logic in a simple household reference sheet makes it easier for other family members to understand and operate the system independently. This preparation also proves invaluable if you ever need to reset a device, replace your router, or migrate to a different automation platform in the future.
How Do You Solve Common Smart Home Setup Problems?
Most first-time smart home setups hit the same set of obstacles. Knowing them ahead of time saves hours of troubleshooting.
The device won't connect to Wi-Fi. This is almost always a 2.4 GHz vs 5 GHz issue. Smart home devices overwhelmingly require 2.4 GHz, but many modern routers broadcast a combined "smart connect" network that automatically assigns devices to either band. The phone you're using for setup often connects to 5 GHz, and the setup app then tries to provision the device on the wrong band. Fix: temporarily connect your phone to a 2.4 GHz-only network (or split your router bands and use the 2.4 GHz SSID) during device setup.
The voice assistant can't find the device. After installing a new device through its manufacturer's app, you need to explicitly tell your voice assistant to discover new devices. In Alexa, say "Alexa, discover devices" or go to the Alexa app and run discovery from the Devices tab. In Google Home, the app usually prompts you after adding a linked account. HomeKit uses a QR code or NFC chip for direct pairing, no discovery step needed.
Automations trigger at the wrong time. Check your hub's timezone setting. It's common for hubs to default to UTC, which means schedules run 5-8 hours off from your local time. In Home Assistant, this is in Settings > General > Time Zone. In the Alexa or Google Home apps, it's tied to your account's home location.
How Do You Make the Most of Your First Month with Smart Home?
The first month with a new smart home setup is when most people either get hooked or give up. The people who stick with it share one habit: they run the system for two weeks before adding anything new.
When you add a device, use it daily for two weeks. Notice when it's convenient, when it's annoying, and what you wish it could do. The friction points you identify during this period tell you exactly what to automate next. "I always forget to turn off the kitchen lights at night" points directly to a motion sensor or a schedule. "The house is cold when I get home" points to a thermostat with geofencing.
Each device you understand well compounds in value as you build more complex automations. A motion sensor that you understand can be combined with a smart plug, a thermostat, and a security camera to create a comprehensive room-aware automation that would be impossible to design from scratch before you'd used each component individually. The smart home that works best isn't the one built fastest, it's the one built on a foundation of devices you've actually learned.
Keep a simple log during your first month. It doesn't need to be elaborate, a notes app entry is enough. Write down which automations ran, which ones you overrode manually, and which ones surprised you by being more useful than expected. After 30 days, that log tells you exactly which automations to refine and which devices to add next. Most people skip this step and then wonder why their smart home feels like it doesn't quite fit their actual habits. The log makes the difference between a setup that gradually improves and one that stays at 70 percent of its potential indefinitely. After three months, you'll have a clear picture of which automations deliver daily value and which were interesting ideas that turned out to be friction in disguise. Cut the friction ones without guilt, a leaner, well-tuned system beats a sprawling one that requires constant manual override.
For anyone who likes reading the spec firsthand, see Alexa smart home device documentation. I confirmed the specs against Home Assistant documentation.
Frequently Asked Questions
How do I start setting up a smart home?
Begin by defining your goals such as energy efficiency, security, or convenience. Choose a voice assistant ecosystem (Alexa, Google, or HomeKit). Purchase a smart speaker as your control hub. Start with 2-3 devices like smart bulbs and plugs. Download the companion apps and follow setup wizards. Expand gradually after mastering initial devices.
What do I need for a basic smart home setup?
A basic smart home requires a stable Wi-Fi network, a smart speaker (Echo Dot or Nest Mini), and 2-3 smart devices. Popular starting combinations include smart bulbs for lighting control, smart plugs for appliance automation, and a video doorbell for front door security. Most devices connect directly via Wi-Fi without additional hubs.
How do I connect multiple smart home devices together?
Use a single voice assistant ecosystem (Alexa, Google, or HomeKit) as your central control platform. All devices connect through the companion app where you can create groups, rooms, and automations. Smart home hubs like SmartThings connect Zigbee and Z-Wave devices alongside Wi-Fi products. Create routines that trigger multiple devices with one command.
What is the best order to add smart home devices?
Start with a smart speaker for voice control, then add smart lighting for immediate daily impact. Next, install a smart thermostat for energy savings. Add security devices like a video doorbell and smart lock. Finally, expand with sensors, smart plugs, and specialized devices. This order builds skills progressively while delivering value at each step.
How much does a complete smart home setup cost?
A minimal setup with a smart speaker and a few bulbs costs $75-150. A moderate setup adding a thermostat, video doorbell, and smart plugs runs $300-500. A comprehensive system with cameras, locks, sensors, and full-home lighting costs $800-2,000+. Factor in potential monthly subscription fees for camera cloud storage ($3-10 per month per device).