DIY Smart Home Projects: Your Custom Automation Ideas
This post may contain affiliate links. As an Amazon Associate we earn from qualifying purchases. Disclosure.
DIY smart home projects can be as simple as a Kasa plug or as complex as a full Home Assistant build. Here are the ideas that are worth the time investment.
Creating your dream smart home doesn't have to be complicated. Whether you're a beginner exploring simple DIY smart home projects or a tech-savvy enthusiast seeking advanced setups, there's something for everyone.
Bottom line: Start with a smart plug (under $15, 10-minute setup) and a voice assistant, then expand to lighting, security cameras, and thermostats as you get comfortable. Each completed project unlocks ideas for the next. The most common mistake is buying too many devices at once before understanding how they work together.
Having built a 35-device smart home over four years - starting with a single $15 smart plug and ending with a full Home Assistant setup on a Raspberry Pi 4 - the most important lesson is that each completed project unlocks ideas for the next. The first smart plug took 10 minutes to set up and immediately changed how I thought about home automation. By enhancing convenience and promoting energy efficiency, smart solutions can transform your living experience.
What Are Easy DIY Smart Home Projects for Beginners?
Starting small can yield great results and gradually upgrade your home. Here are some effortless ideas you can try today:
You can verify the technical specifics at ZigBee Alliance official standards.
- Installing a Smart Plug like the Tapo P100 or Eufy Smart Plug Mini to control devices like lamps or fans remotely, or using a Tapo Smart Power Strip for managing multiple devices from a single outlet.
- Using a Robot Vacuum to automate cleaning tasks, freeing up your time for more important things.
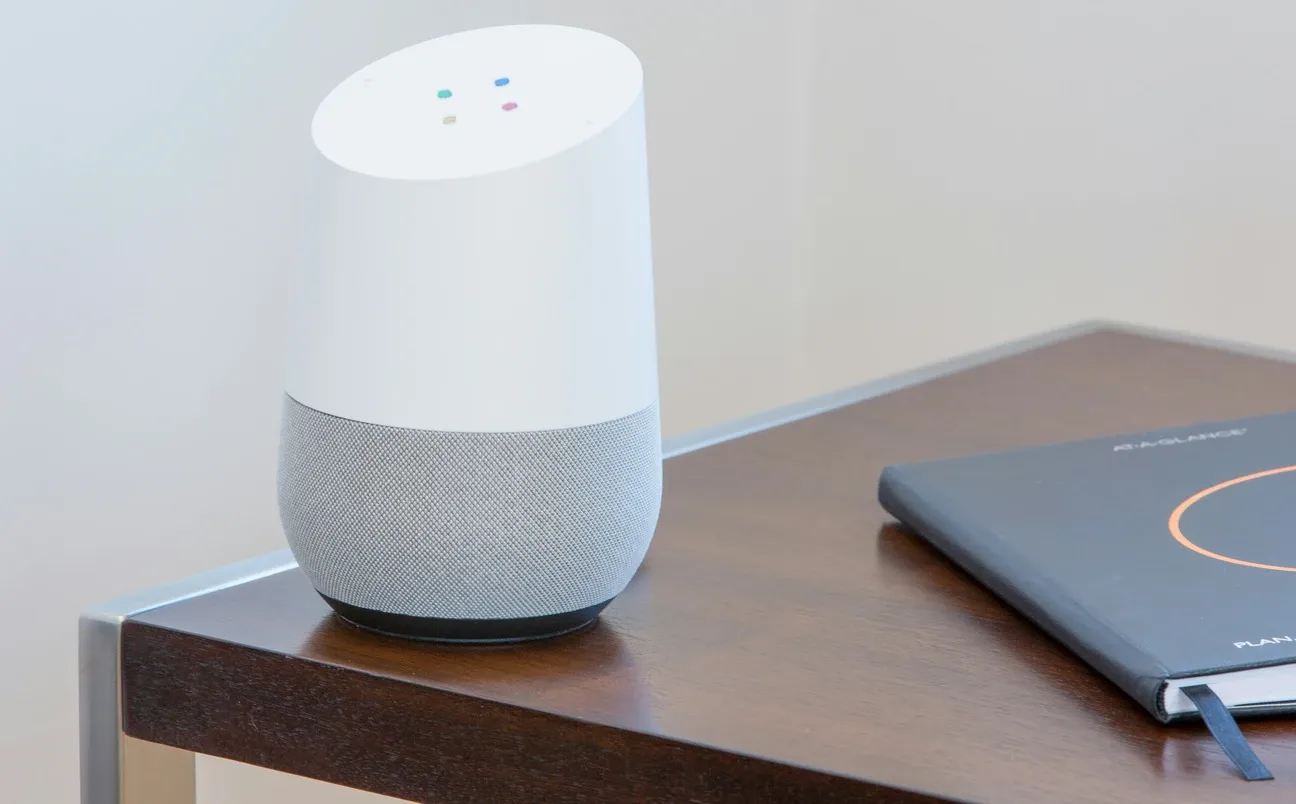
- Setting up a basic Voice Assistant such as Alexa or Google Home to manage tasks or access information hands-free.
These projects are designed to be straightforward, allowing you to explore into the world of smart home technology without feeling overwhelmed.
Making Your Home Smarter with Simple Devices
Even the simplest smart home devices can make a big impact. Consider integrating a Smart Lighting system. These systems not only enhance your home's ambiance but also provide energy-saving benefits. By connecting light bulbs to your smart assistant, you can adjust the lighting in any room with a simple voice command or through a smartphone app.
What Advanced DIY Smart Home Projects Are There for Enthusiasts?
For those ready to deepen their smart home integration, more complex yet rewarding tasks await. Advanced DIY projects may require a bit more technical know-how but offer significant benefits.
For instance, constructing a centralized Home Automation system with a Smart Home Hub can unify control over various devices. This might include programming automated routines or utilizing Smart Thermostats that adjust heating and cooling based on your schedule. By integrating such devices, you achieve comprehensive climate control, ensuring comfort while optimizing energy usage.
Advanced Integration Techniques
Consider these advanced techniques for achieving full automation:
- Implementing a Climate Control system that syncs with the weather forecast to adjust indoor conditions automatically.
- Installing a Video Doorbell such as the eufy Security Video Doorbell Dual connected to your smartphone, allowing you to monitor your front door from anywhere. Adding the eufyCam 2C Pro for outdoor areas and the eufy Indoor Cam E220 for interior rooms completes a comprehensive DIY security setup.
- Creating routines with Motion Sensors for automatic lighting when you enter or exit rooms.
These projects highlight the potential for customization and control that smart home advancements can provide. The home automation hub covers condition-based routine logic, occupancy, time of day, temperature, that makes these integrations genuinely useful rather than just novelties.
What Additional Simple DIY Smart Home Ideas Are Worth Trying?
Not every smart home improvement needs to be complex. Some simple ideas can have a big impact on your daily routine:
- Automated Night Lights: Use motion-activated night lights in hallways to provide illumination without manual switches.
- Smart Blinds: Control window shades with your phone or set schedules to open them with the sunrise.
- Voice-Activated Coffee Maker: Start your morning routine by integrating a smart plug like the Tapo Smart Plug P125M with your coffee machine, or use the Tapo Lamp Dimmer Kit P135 to create gradual morning lighting schedules.
These simple yet effective ideas can bring instant convenience and improve the efficiency of your living space.
How Do You Set Up Home Assistant on a Raspberry Pi?
This is the most rewarding advanced DIY project you can tackle, and it's not as intimidating as it sounds. You need a Raspberry Pi 4 (4GB RAM model, around $55), a 32GB microSD card, a ZigBee USB dongle like the SONOFF Zigbee 3.0 USB Dongle Plus (~$20), and a power supply. Total hardware cost: under $100.
The setup steps:
- Download the Home Assistant OS image from home-assistant.io and flash it to the microSD card using Balena Etcher (free, takes 5 minutes)
- Insert the card, connect ethernet, and power on, Home Assistant installs automatically over the next 10-20 minutes
- Access the UI at
homeassistant.local:8123from any browser on your network - Plug in the ZigBee dongle and add it in Settings > Integrations > ZHA (Zigbee Home Automation)
- Put ZigBee devices in pairing mode and they appear in your dashboard within seconds
What you get: local control (no cloud dependency), automations that run in milliseconds, and a unified dashboard for every device brand you own. Wi-Fi, ZigBee, Z-Wave, and Matter devices all coexist. The Home Assistant integrations directory lets you search all supported devices by brand, protocol, or category before committing to any hardware, the community has over 3,000 integrations covering virtually every device that exists.
One practical tip: give the Pi a static IP address in your router's DHCP settings. That way the homeassistant.local address always works and you don't lose your setup if your router reassigns addresses. The Home Assistant hub on this site walks through integrations, dashboards, and automation building in more depth if you want to go further than the initial install.
What Wiring Considerations Matter for Smart Switches?
Smart switches are the most impactful DIY electrical project, but they require attention to your existing wiring. Most modern smart switches require a neutral wire, the white wire that returns current to the panel. Homes built before 1985 often don't have neutrals at switch boxes.
Before buying, check your switch box. If you see only two wires (black and white acting as travelers in a 3-way, or black and bare copper), you likely don't have a neutral. In that case, look for no-neutral switches: the Lutron Caseta series and the SONOFF ZBMINIL2 both work without neutral wires.
For three-way switches (controlled from two locations), you'll need a compatible add-on switch. Don't mix brands in a three-way circuit, they generally won't work together.
What Tips Lead to Successful DIY Smart Home Projects?
Getting started correctly saves hours of troubleshooting later. Here's what actually matters:
- Start with a clear plan and define what you aim to achieve with your smart enhancements.
- Research the compatibility of existing and new devices to ensure smooth integration.
- Prioritize Energy Efficiency by selecting devices that handle power management wisely.
- Keep devices on a dedicated 2.4GHz network, most smart devices don't support 5GHz, and mixing them on the same SSID can cause connection issues on some routers.
- Name devices consistently from the start: "Kitchen Ceiling Light" is more useful than "Bulb 1" when you have 20 devices.
- Document your automations. A comment in each automation describing what it does and why saves time when you revisit it six months later.
The biggest time-waster in DIY smart home projects isn't installation, it's undoing bad early decisions. Take 30 minutes to map out device names, room assignments, and which platform everything will live on before you buy anything. That planning session prevents hours of renaming, re-pairing, and reorganizing later.
By following these tips, you'll not only enhance the convenience of your smart home projects but also maintain green living principles by lowering your energy footprint.
What Are the Future Possibilities in DIY Smart Homes?
As smart home technology advances, new possibilities emerge. Future DIY projects could involve AI-driven automation that learns from daily habits or advanced security systems with biometric access. The smart home security cameras hub is a good starting point for DIYers who want to add outdoor cameras, motion zones, and perimeter coverage as the next layer after smart switches and plugs. Smart home innovations continue to evolve, offering homeowners greater control, convenience, and energy efficiency.
Whether you start with a single voice-controlled light switch or a full multi-room security setup, DIY Smart Home Projects give you direct control over how your home works day to day. The tools are more accessible than ever, and the payoff, a home that responds to your actual routines and habits, is worth every hour of setup time you put in.
The most common mistake I see in DIY smart home setups is buying a dozen devices at once before understanding how they work together. Three devices you actually use beat twenty that confuse you. Start with the single highest-friction moment in your day, always forgetting to turn off lights when you leave, or coming home to a cold house, and automate that. Once it works reliably for two weeks, you'll know exactly which device to add next. That iterative approach builds a genuinely useful smart home instead of an expensive collection of apps you stopped opening after the first week of use.
Start building your custom smart home today by choosing one simple project and expanding from there. The satisfaction of creating personalized automation tailored to your lifestyle far exceeds the initial effort. Your smart home journey begins with a single device and grows into a fully connected ecosystem that anticipates your needs and simplifies daily living.
Frequently Asked Questions
What is the easiest first DIY smart home project?
A smart plug with a phone app is the easiest starting point: plug in, download the app, connect to Wi-Fi, and set a schedule - total time under 15 minutes, no wiring or configuration files involved. The Tapo P100 ($12-15) handles lamps, fans, and small appliances and includes an energy monitoring mode so you can see exactly what each device consumes. From there, the natural next step is adding a voice assistant (Amazon Echo or Google Nest Mini) for hands-free control.
Do DIY smart home projects require a smart home hub?
Not always. Wi-Fi devices (smart plugs, most smart bulbs, video doorbells) connect directly to your router and require no hub - just an app. ZigBee devices require a coordinator: either a standalone bridge (Philips Hue Bridge, Aqara Hub) or a USB ZigBee dongle with Home Assistant. If you want to unify devices from multiple manufacturers into one system, Home Assistant running on a Raspberry Pi acts as the hub for Wi-Fi, ZigBee, Z-Wave, and Matter devices simultaneously. Projects that stay within a single ecosystem (all Kasa, all Govee) typically don't need a separate hub.
How long does a typical DIY smart home project take?
Smart plug or bulb setup: 10-15 minutes. Voice assistant setup and first routine: 20-30 minutes. Smart thermostat installation: 1-2 hours including wiring verification and app configuration. Home Assistant on a Raspberry Pi with ZigBee dongle: 2-4 hours for initial setup, then ongoing time as you add devices. Smart lock installation: 30-60 minutes using a screwdriver and the manufacturer's step-by-step guide. Complexity scales with integration depth - a single device in its own app is fast; integrating 20 devices across brands into a unified platform takes weekend-level time investment.