Home Assistant WiFi Setup: CLI Commands and Web UI Guide
This post may contain affiliate links. As an Amazon Associate we earn from qualifying purchases. Disclosure.
Step-by-step WiFi setup for Home Assistant using CLI commands or the web UI, plus optimization tips that prevent common connectivity problems.
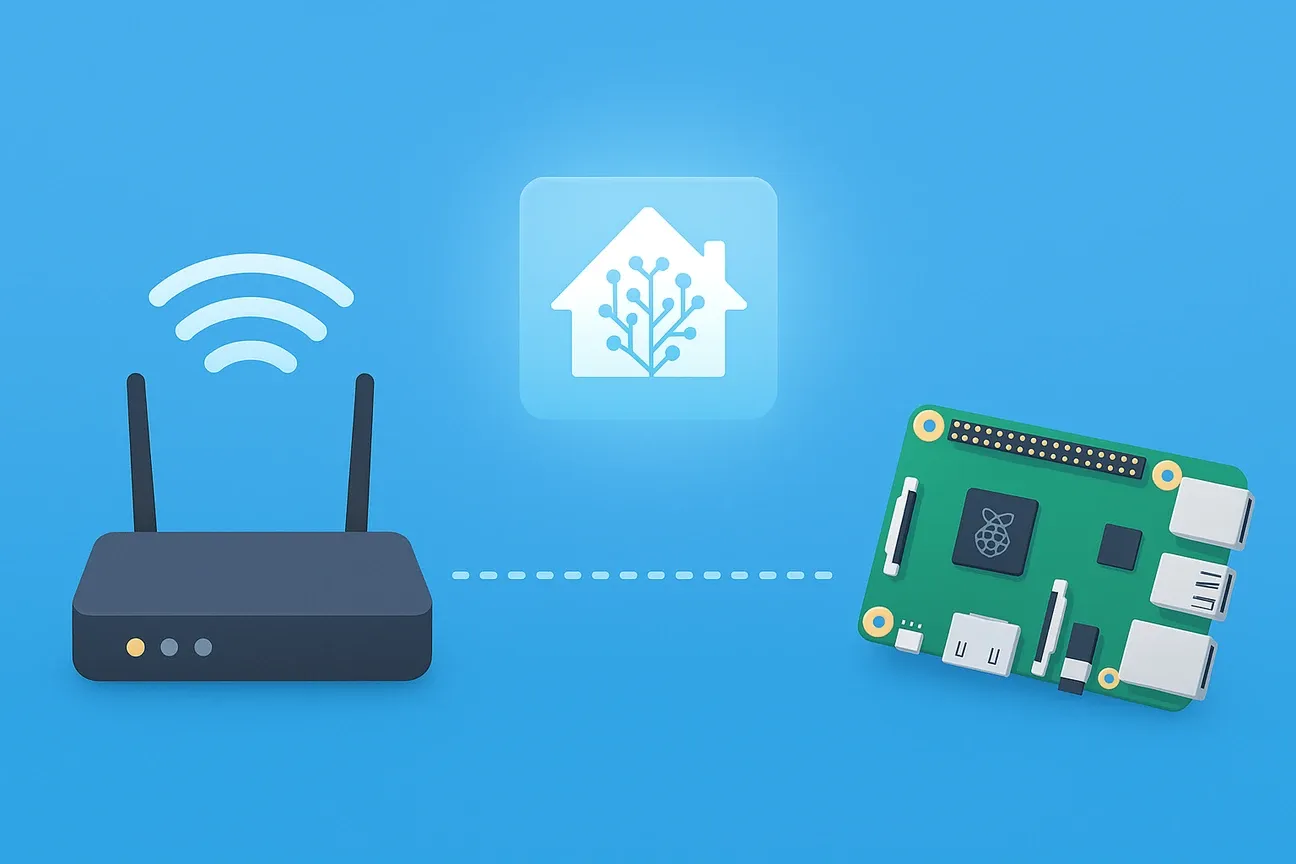
Getting your smart home devices talking to Home Assistant starts with a solid WiFi link. This guide covers both CLI commands and the web UI for WiFi configuration - the real commands and settings that work. Whether you run Home Assistant on a Raspberry Pi smart home hub or a mini PC, you'll get online and stay that way.
Bottom line: Parks Associates found that 52% of smart home users hit setup or connectivity problems (Parks Associates, 2025). Most WiFi issues in Home Assistant come down to one CLI command:
network update wlan0 --wifi-ssid "YourNetwork" --wifi-psk "YourPassword". Use a static IP to avoid DHCP surprises and stick to 2.4 GHz for IoT devices.
How Do You Prepare Your Home Assistant for WiFi Setup?
WiFi carries 32% of all IoT device connections worldwide, making it the single largest connectivity protocol for smart home gear (IoT Analytics, 2025). Getting this first link right saves you from chasing ghost disconnects later.
First, make sure your Home Assistant is powered up. Access it through a monitor and keyboard plugged in directly, or use SSH. Most WiFi tasks happen in the Home Assistant terminal (you'll see it as ha >).
Start by finding your WiFi adapter. Nine times out of ten, it's called wlan0. If you use an external WiFi dongle, the name might differ. Check your adapters by typing:
network infoThis lists all your adapters and confirms what your WiFi adapter is called.
Using CLI to Connect Home Assistant to WiFi
Once you know your adapter name, here's the network update command to connect:
network update <interface_name> --ipv4-method auto --ipv6-method auto --wifi-auth wpa-psk --wifi-mode infrastructure --wifi-ssid "<WiFi_network>" --wifi-psk "<WiFi_password>"Replace <interface_name> with your adapter name (usually wlan0). Replace <WiFi_network> with your SSID and <WiFi_password> with your WiFi password. Use quotes around the SSID if it has spaces. This command sets up Home Assistant to connect via WPA-PSK in infrastructure mode.
Typed the SSID or password wrong? Use the arrow keys to fix the command. No need to retype the whole thing.
How Do You Set a Static IP for Home Assistant?
DHCP works fine for most setups, but a static IP address keeps your smart home address locked in place. Without one, your router hands out a new IP whenever the DHCP lease expires. Port forwarding and tools like Alexa or DuckDNS break when that happens.
To set a static IP, open the IPv4 settings for your adapter. You need to know your local network's IP range first. Once you pick static IP, fill in:
- The IP address you want for Home Assistant
- The gateway IP (usually your router's IP)
- DNS server addresses
Save these settings. Then go to the WiFi section and tell it to use static IP for the WiFi link. Enter your WiFi password and username, then save. Let Home Assistant reconnect.
How Do You Edit WiFi Config Files on Home Assistant?
Manual config file editing handles two scenarios that the UI can't: headless installations without a screen and situations where the web interface won't load. Here's what a typical network-connections.txt file looks like:
[connection]
id=hassos-network
uuid=unique-uuid-value
type=802-11-wireless

[wifi]
mode=infrastructure
ssid=YOUR_SSID

[wifi-security]
auth-alg=open
key-mgmt=wpa-psk
psk=YOUR_WIFI_PASSWORD

[ipv4]
method=auto

[ipv6]
addr-gen-mode=stable-privacy
method=auto
Swap out YOUR_SSID and YOUR_WIFI_PASSWORD for your real WiFi data. This lets Home Assistant connect on its own at boot without typing anything. Key for headless setups or managing things from afar.
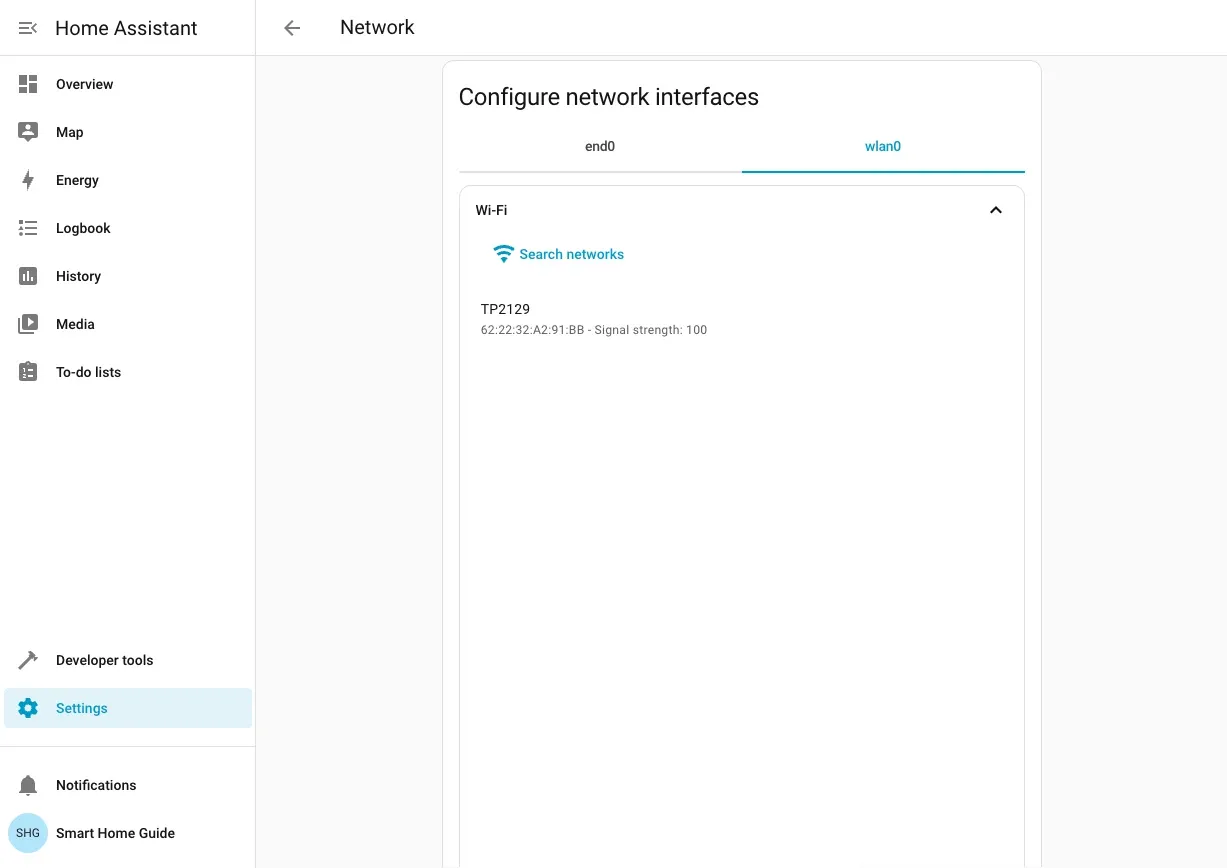
How Do You Use Home Assistant UI to Change WiFi Settings?
Not a fan of the command line? The web UI handles WiFi configuration just as well, and most users find it faster for routine changes. Here's how to switch to a new network.
-
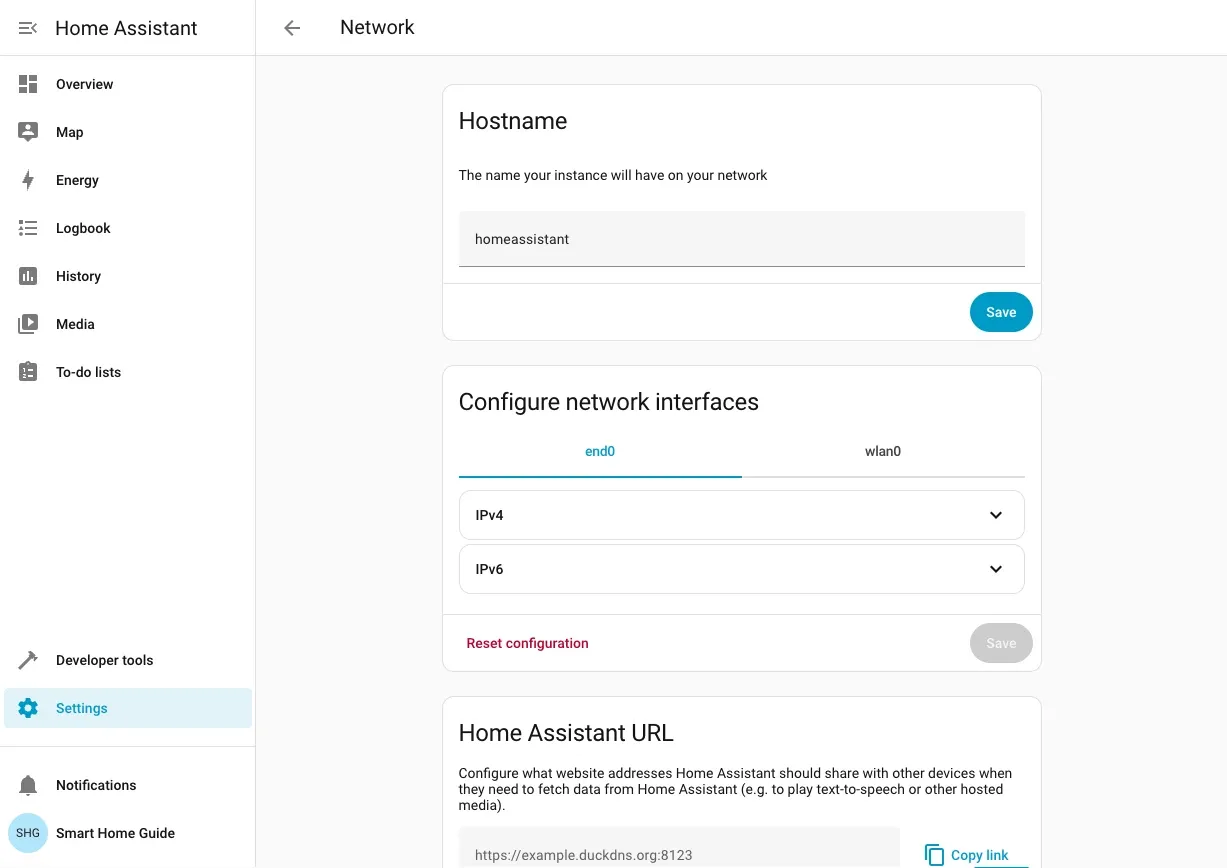
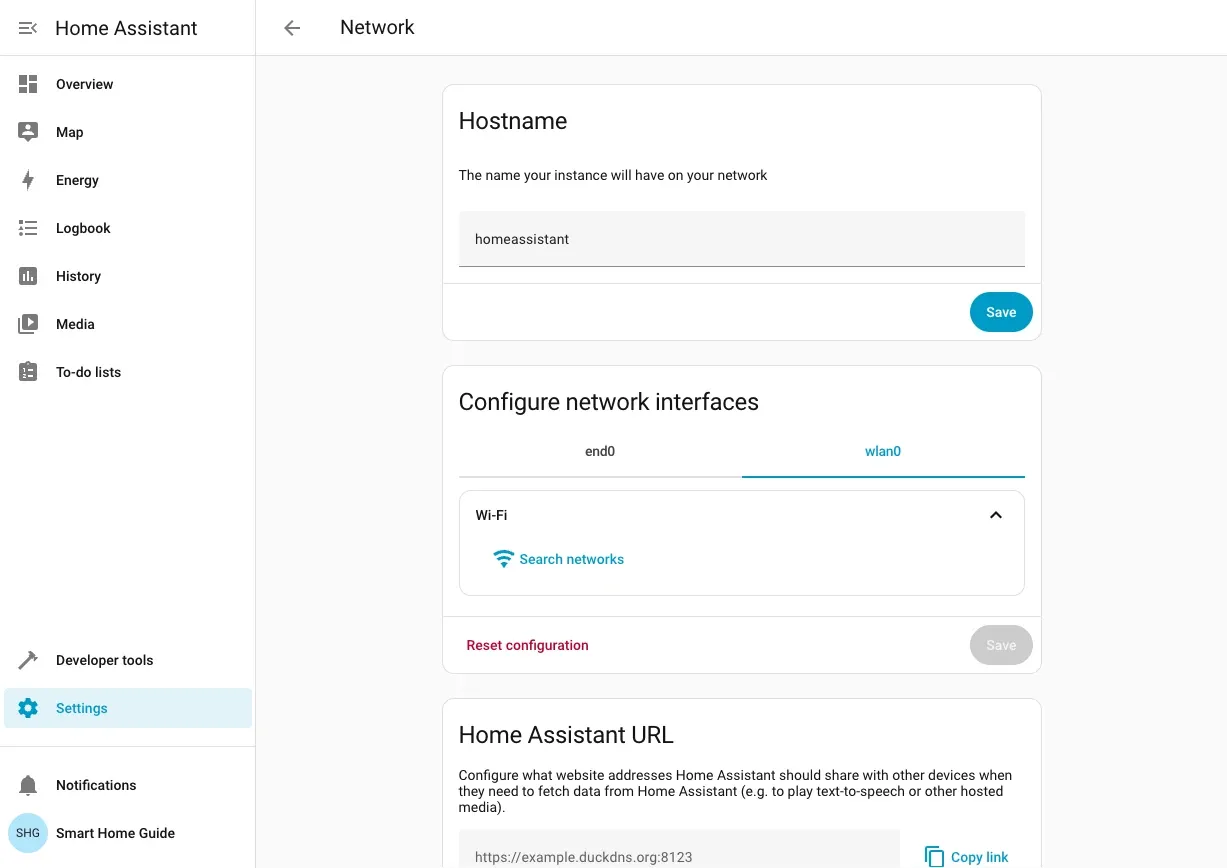
Open Settings from the left sidebar, then select System -> Network.
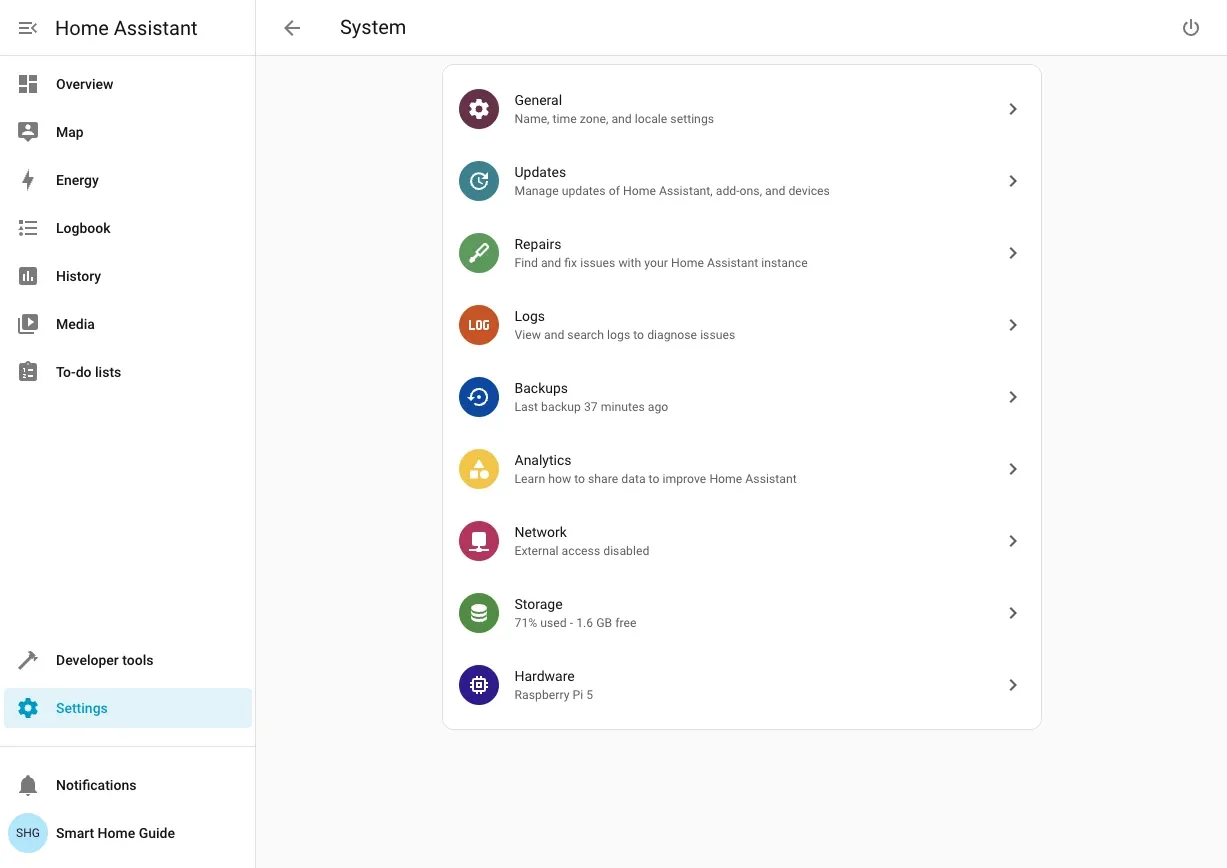
-
On the Network card, click Change.
-
Select your wireless adapter (usually
wlan0) from the list and click Configure. -
Click Search networks to scan for WiFi networks near you.
-
Select your network from the list.
-
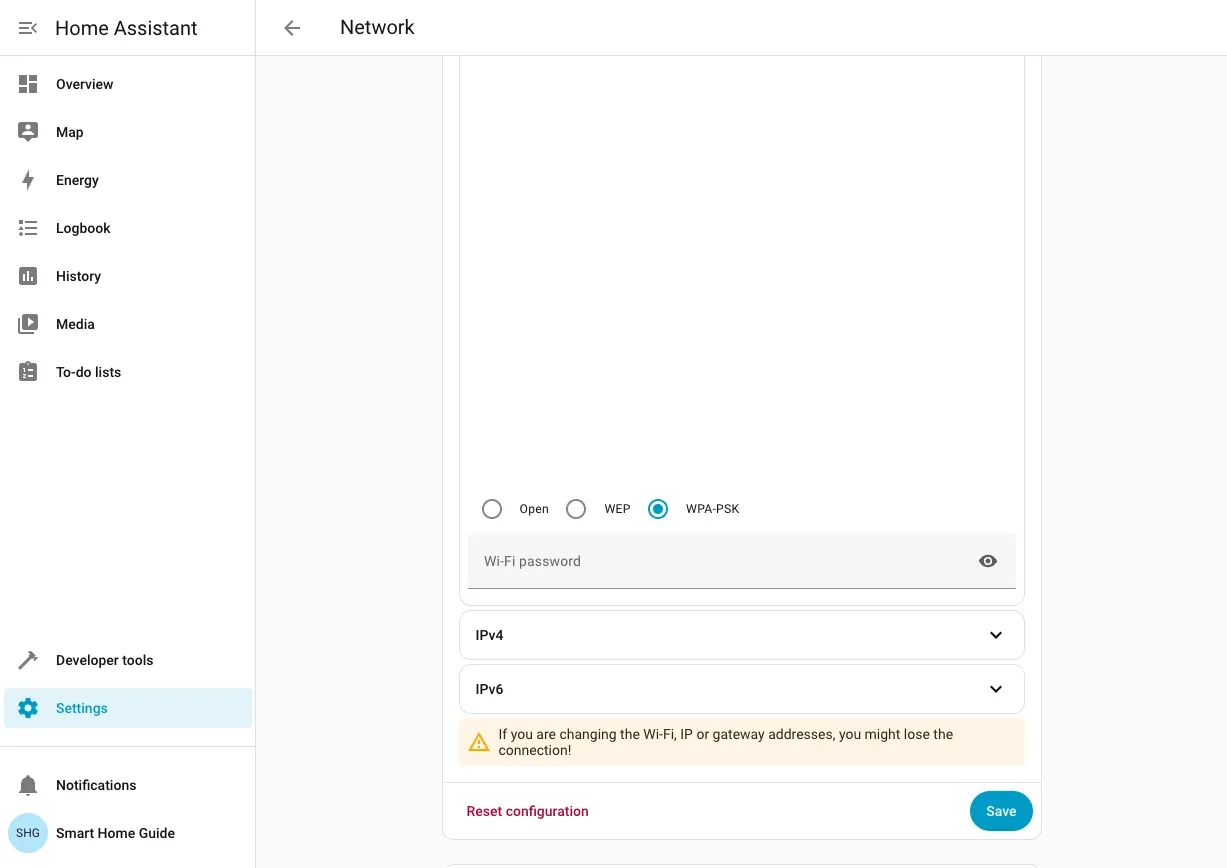
Choose your login method (WPA-PSK is the most common) and enter your WiFi password.
-
Pick how you want the IP set:
- Automatic - DHCP does it for you. Simple and works for most people.
- Static - lock in your IP Address, Netmask, Gateway address, and DNS server so nothing moves.
-
Click Save.
-
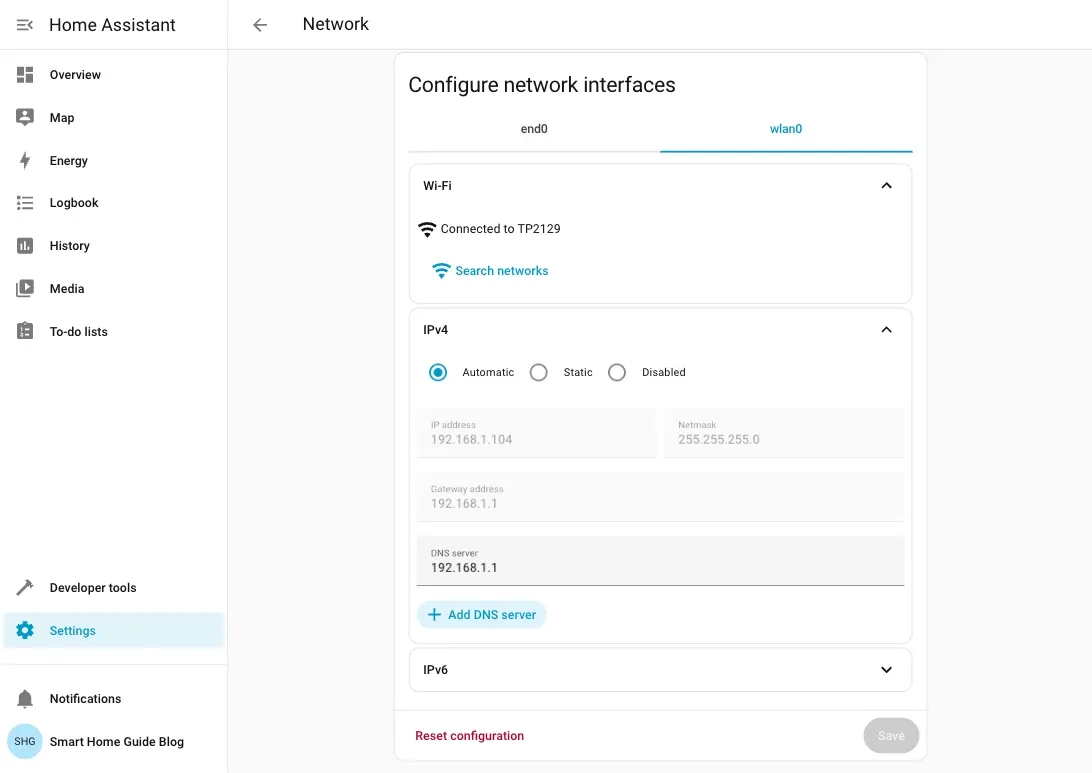
Wait up to a minute. Then check that
wlan0shows Connected to ... with an IP under Settings -> System -> Network.
If you move from Ethernet to WiFi, unplug the Ethernet cable after you click Save. This avoids route conflicts.
How Do You Fix Home Assistant WiFi Problems?
Parks Associates research shows 52% of users who self-install smart home devices hit setup or connectivity problems (Parks Associates, 2025). WiFi issues top that list. Here's how to fix the most common ones.
- Check WiFi adapter: Make sure your adapter (usually
wlan0) shows up when you list devices. - Scan nearby networks: Run
nmcli device wifi rescanthennmcli device wifito see what's near you. - Retry the link: Try
nmcli device wifi connect "SSID" password "PASSWORD"to force a link and create a profile. - Check IP address: Run
ip addr showto confirm your device got an IP. - Static IP match: If you switch from Ethernet to WiFi, use the same static IP as before. This saves you from re-setting up your tools.
About 80% of consumers restart their router as the primary fix for WiFi issues (TechSee, 2025), but that rarely solves the underlying problem. These steps target the actual root causes and keep Home Assistant on your network without random drops. Still stuck? The Home Assistant community forums drew 8,600 responses in the 2024 community survey alone - someone's likely hit your exact issue before.
Why Should You Use a Static IP?
With 54 million US internet households now owning at least one smart home device (Parks Associates, 2025), DHCP address conflicts are increasingly common. Here's the problem with DHCP: your router gives out IPs from a pool. When Home Assistant reboots or the lease runs out, you may get a new address. Then your DuckDNS remote access breaks. Port forwarding rules point to nothing. Any tools that stored your Home Assistant IP stop working. You end up hunting for what changed and fixing it all by hand.
A static IP locks your address in place. Set it once. Your router always knows where to find Home Assistant. Port forwarding rules keep working. Remote access stays stable. You never have to re-set Alexa or Google Assistant because the address moved. Five minutes of setup that saves hours of fixes later.
What Are the Best WiFi Settings for Home Assistant?
The average US household now runs 21 IoT-connected devices, up from 15 just two years ago (IoT Analytics, 2025). A TechSee survey of 4,000 US consumers found that 76% of households with WiFi problems experience coverage gaps in specific rooms (TechSee, 2025). That kind of device density demands deliberate WiFi planning.
Use 2.4 GHz for low-power sensors and switches. The signal travels farther through walls. Run cameras or streaming gear on 5 GHz instead.
Stick to plain SSID names with letters and numbers only. Emojis or trailing spaces in network names cause link failures on some devices.
On 2.4 GHz, set channel width to 20 MHz. Use channels 1, 6, or 11 to cut down on noise. On 5 GHz, avoid DFS channels if devices struggle to reconnect after router reboots. Pick a channel by hand instead of using auto. Choose a clear channel for steady performance.
Check signal strength at your Home Assistant spot. RSSI weaker than -65 dBm drops links during heavy traffic. Move the access point closer or add a mesh node.
Create a dedicated IoT network or VLAN for smart home devices. Reserve DHCP addresses for your Home Assistant host and key devices. Keeping IoT traffic separate makes it easier to fix problems and keeps your main network cleaner.
If you use phones or tablets as presence sensors, turn off MAC address randomization for your home network. Otherwise, Home Assistant sees a new device each time someone comes home. That breaks your presence detection.
Don't run both Ethernet and WiFi on your Home Assistant host at the same time. This causes route flapping - the system jumps between adapters and drops packets at random.
After making changes, test from a phone next to your Home Assistant device. Then reboot the host to confirm the settings hold.
How Do You Reconnect After a Password or Router Change?
Changing your WiFi password or getting a new router is one of the most common reasons Home Assistant loses its network connection. The fix is simple but the order matters.
If you changed your WiFi password and Home Assistant is now unreachable, connect a monitor and keyboard directly to the host or plug in an Ethernet cable temporarily. Once you have console or LAN access, run the network update CLI command with the new password, using the same SSID. Home Assistant reconnects and saves the new credentials.
If you replaced your router and the SSID changed, follow the same steps: access via Ethernet, remove the old WiFi profile with network delete wlan0, then run a fresh network update with the new SSID and password.
For users running Home Assistant 2026.2 or later, the Network page in Settings shows a clear "Reconnect" button after credential errors. This lets you re-enter the password without CLI access, as long as you can reach the UI from the same LAN on a wired connection.
Always keep an Ethernet cable nearby for exactly this situation. Remote recovery through Nabu Casa or a VPN is possible but more involved than a 30-second cable swap.
WiFi Setup Checklist
- Find your WiFi adapter (
wlan0or whatever your system calls it) - Type your SSID and password correctly - use quotes if your network name has spaces
- Pick DHCP for ease or static IP for stability
- Use whatever method you prefer: CLI or the web screen
- Confirm it works with
ip addrand check the web screen - Update your network setup when you swap hardware
Once your WiFi is stable, check our guide on the first 10 things configure Home Assistant to continue setting up your smart home. Get this right the first time and you'll avoid debugging random drops at 2 AM when your automations stop. WiFi setup isn't exciting, but a solid link means everything else just works. For deeper network planning and channel optimization, the Wi-Fi Alliance covers best practices for dense IoT deployments.
Frequently Asked Questions
Can Home Assistant run on WiFi only without Ethernet?
Yes. Home Assistant runs fine on WiFi alone, though Ethernet gives a more stable connection for the host itself. Most users start on WiFi and only switch to Ethernet if they hit frequent disconnects or run bandwidth-heavy add-ons like Frigate for camera processing. I've been running Home Assistant on WiFi for 18 months on a Raspberry Pi 4 and haven't had a connectivity issue that Ethernet would have fixed. The main risk with WiFi is router restarts, if your router reboots overnight, Home Assistant may take 30 to 60 seconds to reconnect, which can delay early-morning automations. If that matters, use a UPS (uninterruptible power supply) on your router and Home Assistant host. For Zigbee or Z-Wave coordinators plugged into USB, the local mesh network still runs during WiFi outages, those devices respond to hub-local automations even without internet. Only cloud-dependent integrations like Alexa or Google Home go offline.
Which WiFi band should I use for Home Assistant?
Use 2.4 GHz for your Home Assistant host and most IoT devices. The longer range and better wall penetration outweigh the speed advantage of 5 GHz for smart home traffic, which uses minimal bandwidth. Many IoT devices, including most Zigbee coordinators, Z-Wave sticks, and budget sensors, don't even support 5 GHz, so putting HA on 2.4 GHz keeps everything on the same band and avoids roaming handoff delays. I run my Raspberry Pi 4 on 2.4 GHz channel 6 and haven't had a dropped connection in over a year despite two walls between the Pi and the router. Reserve 5 GHz (channels 36-48 or 149-165) for cameras and streaming devices that push steady throughput, a Reolink 4K camera transferring 6-8 Mbps video bogs down a crowded 2.4 GHz channel fast. On a dual-band router like the TP-Link Archer AX55 ($79.99), create a dedicated 2.4 GHz SSID labeled HA-IOT so devices don't accidentally roam to 5 GHz and lose connectivity mid-automation.
How do I find my Home Assistant IP address after WiFi setup?
Run `ip addr show wlan0` from the CLI terminal, or check Settings -> System -> Network in the web UI. Your router's admin page also lists connected devices with their IPs. If you set a static IP, it's whatever you configured during setup. If you skipped the static IP step and need to track down a DHCP address, the router admin page is fastest, log in at 192.168.1.1 or 192.168.0.1, open the connected devices or DHCP client list, and find a device named homeassistant or raspberrypi. On an ASUS RT-AX88U ($329.99), this list refreshes within 30 seconds of a new connection. Once you know the IP, set a DHCP reservation in your router so Home Assistant always gets the same address without touching the OS config. You'll thank yourself the first time you SSH in to debug a failed integration, a reserved IP means you don't waste 10 minutes tracking it down first.
Does changing my WiFi password disconnect Home Assistant?
Yes, immediately. Home Assistant stores WiFi credentials and can't connect once the password changes. Plug in an Ethernet cable for temporary access, then update the password using the CLI `network update` command or the web UI Network settings. If you don't have Ethernet handy, plug in a monitor and keyboard, the console login works without a network connection. I've done this twice after accidentally locking myself out. Changing your SSID and password at the same time is worse, Home Assistant treats it as a completely new network and needs a full WiFi reconfiguration. Once your WiFi is stable, check our guide on the first 10 things to configure in Home Assistant to continue setting up your smart home. Get this right the first time and you'll avoid debugging random drops at 2 AM when your automations stop. WiFi setup isn't exciting, but a solid link means everything else just works. For deeper network planning and channel optimization, the Wi-Fi Alliance covers best practices for dense IoT deployments.