Linkind WS110ZW Smart Switch: Z-Wave Reliability for Home Assistant
Product Details
🏭 Manufacturer: Linkind
🆔 Model Number: WS110ZW
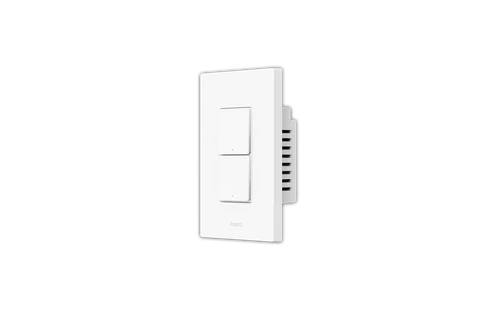
The Linkind WS110ZW is an in-wall Z-Wave smart switch designed for single-pole and 3-way wiring configurations. It replaces a standard toggle switch in a junction box, connects to a Z-Wave hub, and lets you control lights remotely or through automations. Neutral wire is required. There's no built-in Wi-Fi, no cloud account to set up, and no subscription. The switch works entirely through your Z-Wave hub's local network.
That's the appeal. If you run Home Assistant or SmartThings locally, the Linkind WS110ZW fits into an ecosystem where everything happens on your LAN. Lights respond in under 100 milliseconds. Your automations keep running if your internet is down.
Who Is This Switch For?
This switch suits people who've already chosen Z-Wave as their home automation protocol. Z-Wave runs on the 908.42 MHz band in North America - a dedicated frequency with no competition from Wi-Fi or Bluetooth. A Z-Wave network is a mesh: every mains-powered device also acts as a repeater, so coverage improves as you add more switches.
If you're building a whole-house automation setup, Z-Wave switches are a better foundation than Wi-Fi switches. Wi-Fi devices eat router bandwidth and depend on cloud servers staying online. Z-Wave devices don't.
The Linkind WS110ZW is compatible with any Z-Wave or Z-Wave Plus certified hub. That includes SmartThings, Wink, Vera, Fibaro, and Home Assistant with a Z-Wave USB stick (Aeotec Z-Stick 7 or HUSBZB-1 are common choices). The switch is Z-Wave Plus certified, which means it uses the improved 500-series chipset with better range and battery efficiency than older Z-Wave hardware.
Is This Switch Right for 3-Way Setups?
Yes, but you need two Linkind WS110ZW units. Standard 3-way wiring uses traveler wires between the two switch boxes. The Linkind setup replaces both switches with smart units that communicate over Z-Wave instead of traveler wires. You'll need to cap off the traveler wire at both boxes. The companion switch (sometimes called the auxiliary or remote switch) still needs a neutral wire at its box, which is where this setup can become complicated in older homes.
If your 3-way switch box doesn't have a neutral wire at both locations, you'll need an electrician to run one or choose a different switch brand that supports no-neutral configurations.
Installation and First Setup
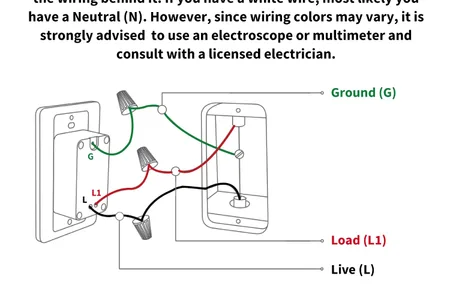
Installation follows the same steps as any in-wall smart switch replacement. Turn off the breaker. Remove the old switch. Identify the line (hot), load, neutral, and ground wires. The WS110ZW has labeled terminals for each. Connect and secure. Mount in the box. Restore power.
The whole process takes about 20 minutes per switch for someone comfortable with basic electrical work. If you haven't done in-wall wiring before, hire an electrician. The National Electrical Code requires proper wire gauge and box fill compliance - this isn't a job to guess at.
What You Need Before Starting
- Neutral wire present at the switch box (white wire in the bundle, not just line and load)
- Single-pole OR 3-way configuration (the WS110ZW handles both, but 3-way needs two units)
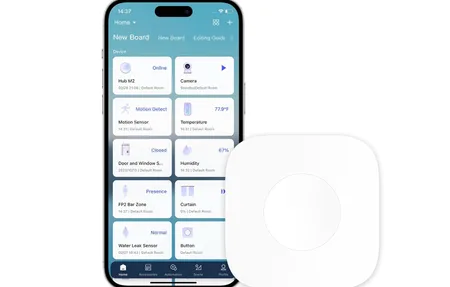
- A Z-Wave hub already set up and working on your network
- Flathead and Phillips screwdrivers, voltage tester, wire nuts
Hub Pairing
After installation, pairing is straightforward. Put your hub in Z-Wave inclusion mode, then press the top paddle on the switch three times quickly. The switch joins the mesh within a few seconds. It appears as a generic Z-Wave switch in most hub interfaces.
In Home Assistant with ZwaveJS, the device shows up with a basic on/off entity. You can rename it, assign it to a room, and start writing automations immediately. There's no special driver or custom integration required - it's a standard Z-Wave switch.
SmartThings users will find it equally simple. The SmartThings app detects it as a Z-Wave switch and assigns a default device handler. You get on/off control and scene inclusion support out of the box.
Z-Wave Mesh Performance
One Z-Wave switch doesn't show you the protocol's strength. The mesh benefits become obvious once you have five or more devices. Each mains-powered switch extends the mesh's reach. A switch at the back of a basement or in a detached garage that wouldn't reach the hub directly can route its traffic through two or three intermediate switches and still respond reliably.
Z-Wave's dedicated frequency also means it doesn't compete with your 2.4 GHz Wi-Fi or Bluetooth devices. In homes with dozens of Wi-Fi devices, Z-Wave switches respond more consistently than Wi-Fi switches that share congested airspace.
Does Z-Wave require more upfront planning than a Wi-Fi smart switch? It does. You need a hub. You need to think about mesh coverage. But the payoff is a network that doesn't need the internet to function and responds as fast as a physical switch.
Energy Monitoring
The WS110ZW does not include energy monitoring. It's a straight on/off (and scene control) device. If you need per-circuit wattage tracking, look at Z-Wave switches from Aeotec or Zooz that include power metering. The Linkind switch is positioned as an affordable entry point to Z-Wave automation, not a full-featured monitoring device.
Local Control and Reliability
The defining feature of Z-Wave switches compared to most Wi-Fi switches is local processing. When you tap the paddle manually, the switch responds instantly - no cloud round trip, no latency. When an automation fires in Home Assistant, the command goes hub to switch over the Z-Wave mesh, typically in under 150 milliseconds.
That response time holds even if your internet is down. Your router goes offline during a storm - your Z-Wave automations keep running. Your Wi-Fi smart bulbs stop responding. This is the practical reason serious home automation builders choose Z-Wave for in-wall switches even though the upfront cost is higher than Wi-Fi alternatives.
Final Verdict
The Linkind WS110ZW is a competent, no-frills Z-Wave Plus in-wall switch at a lower price point than Leviton or GE/Enbrighten. It doesn't have energy monitoring, a built-in dimmer variant, or a fancy app. What it has is solid Z-Wave Plus hardware that works with every major hub and keeps your automations running locally.
For Home Assistant users building a Z-Wave mesh, this switch is a practical choice for rooms where you want reliable local control without paying a premium for features you don't need. For 3-way setups, budget for two switches and confirm neutral wire availability at both boxes before you buy.
If you're new to Z-Wave entirely, start with a starter kit that includes a hub before adding in-wall switches. The protocol rewards planning.