
Connecting your smart home devices in Home Assistant requires a stable, seamless WiFi connection. This guide will help you understand how to configure WiFi in Home Assistant properly, ensuring reliable performance of your smart devices and enabling smooth home automation. Whether you are setting up Home Assistant on a Raspberry Pi or other hardware, following these steps will help you avoid common connectivity issues.
Preparing Your Home Assistant for WiFi Setup
Before diving into WiFi configuration, ensure your Home Assistant system is powered and accessible either via a direct monitor-and-keyboard connection or through the command-line interface (CLI). You will often use the Home Assistant terminal (shown as ha >) to manage network settings.
To begin, identify the WiFi adapter in your system. Typically, the WiFi interface is named wlan0, but this might differ if you use an external adapter. You can check available network interfaces by typing:
network info
This command lists all your network interfaces, so you can confirm the WiFi adapter name.
Using CLI to Connect Home Assistant to WiFi
Once you have the interface name, use the following command pattern to connect to your WiFi network:
network update <interface_name> --ipv4-method auto --ipv6-method auto --wifi-auth wpa-psk --wifi-mode infrastructure --wifi-ssid "<WiFi_network>" --wifi-psk "<WiFi_password>"
Replace <interface_name> with your WiFi adapter name (usually wlan0), <WiFi_network> with your WiFi SSID (network name), and <WiFi_password> with the password of your WiFi network. Use quotes around the SSID if it includes spaces. This command automatically configures Home Assistant to connect using WPA-PSK security in infrastructure mode.
Tip: If you make a mistake entering your SSID or password, use the keyboard's arrow keys to edit the command without retyping everything.
Setting a Static IP Address for Home Assistant WiFi
While DHCP automatically assigns IP addresses, many prefer setting a static IP address for Home Assistant. This makes managing your smart home network easier, as the IP doesn’t change and you can configure port forwarding or integrations like Alexa or DuckDNS reliably.
To set a static IP, access the IPv4 settings of your network interface. You need to know the IP range of your local network beforehand. After selecting static IP, enter the following:
- The desired IP address for Home Assistant.
- The gateway IP (usually your router’s IP).
- DNS server addresses.
Save these settings, then navigate to the WiFi section to specify whether to use DHCP or static IP for the WiFi connection. After entering your WiFi credentials, save and allow Home Assistant to reconnect.
Editing Configuration Files for WiFi on Home Assistant
For advanced users, or for certain installations, manually creating or editing configuration files may be necessary. A typical network-connections.txt file for WiFi on Home Assistant looks like this:
[connection]
id=hassos-network
uuid=unique-uuid-value
type=802-11-wireless

[wifi]
mode=infrastructure
ssid=YOUR_SSID

[wifi-security]
auth-alg=open
key-mgmt=wpa-psk
psk=YOUR_WIFI_PASSWORD

[ipv4]
method=auto

[ipv6]
addr-gen-mode=stable-privacy
method=auto
Replace YOUR_SSID and YOUR_WIFI_PASSWORD with your network details. This file lets Home Assistant connect on boot without additional input-crucial for headless or remote setups.
Using Home Assistant UI to Change WiFi Settings
Follow these screenshots to switch Home Assistant to a new WiFi network-no CLI required.
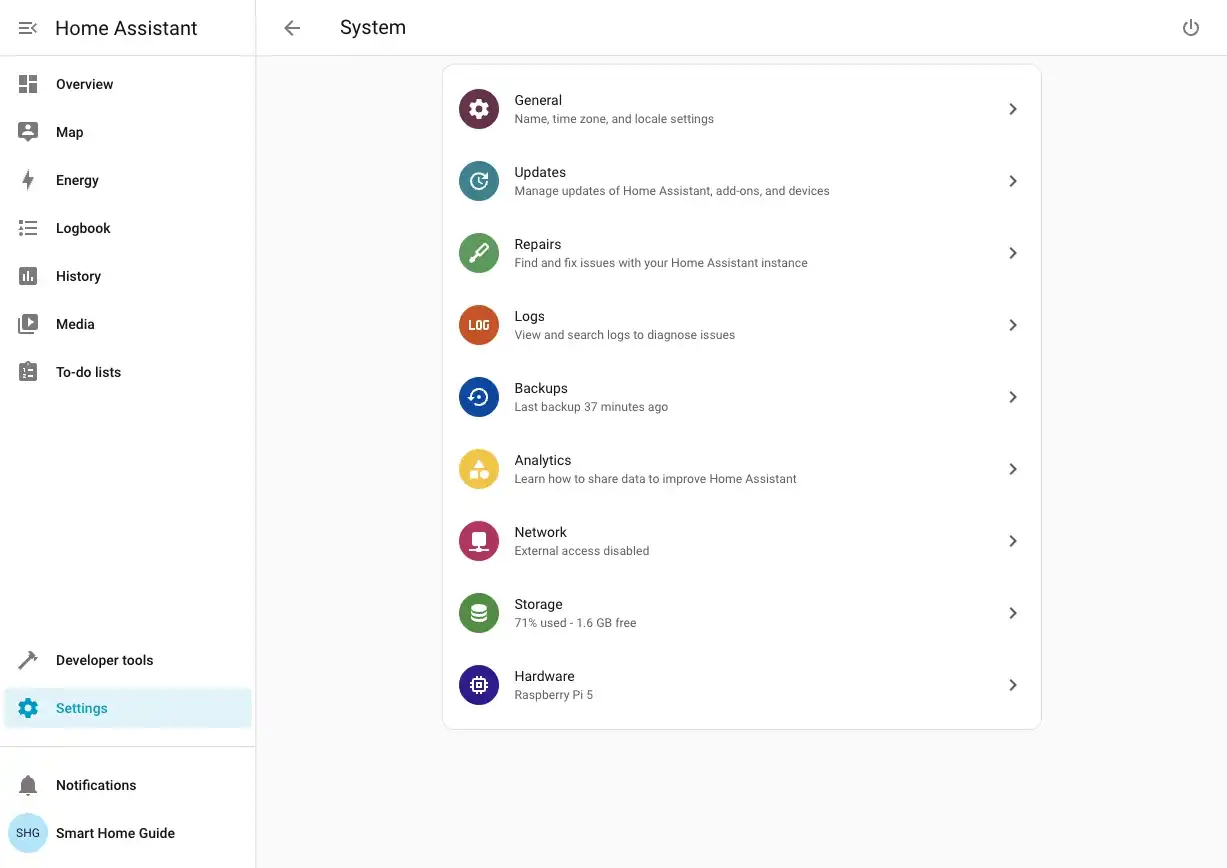
Open Settings from the left sidebar, then select System → Network.
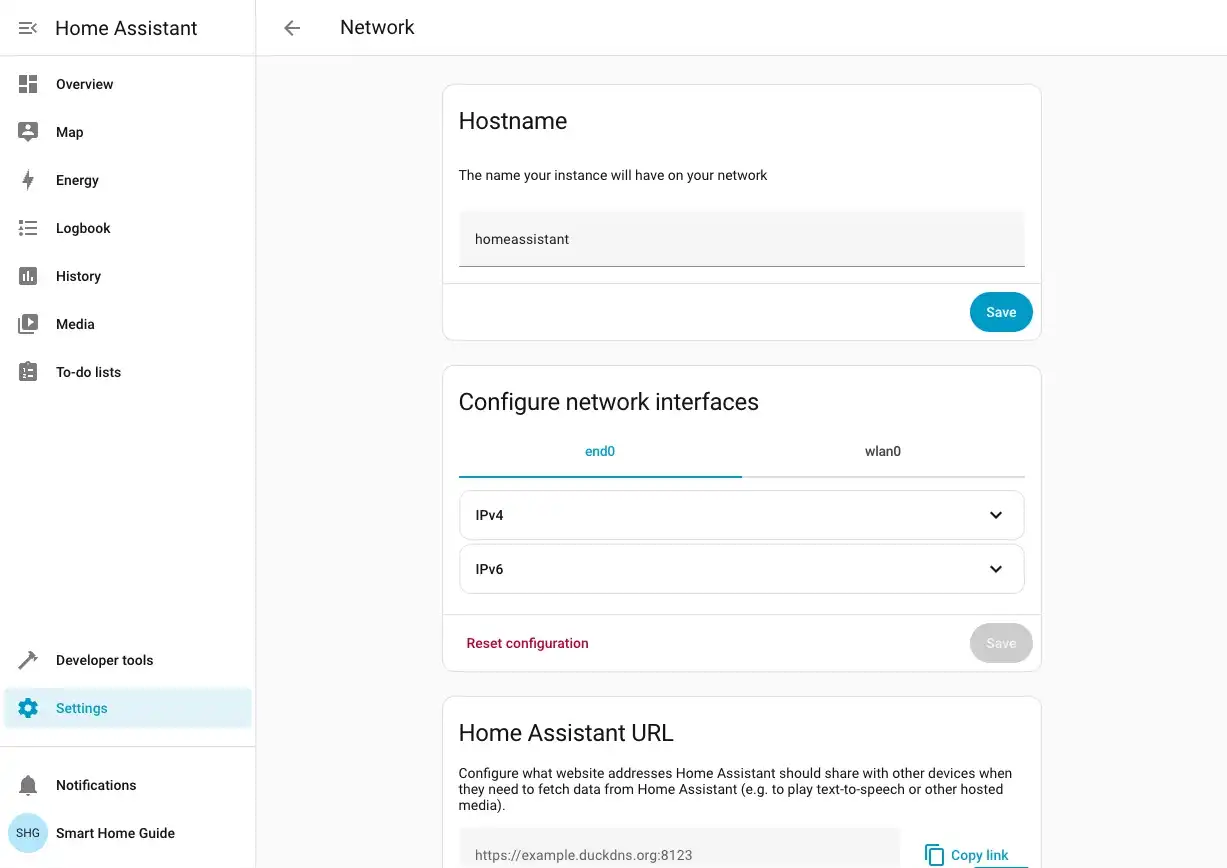
On the Network card, click Change.
Select your wireless interface (usually
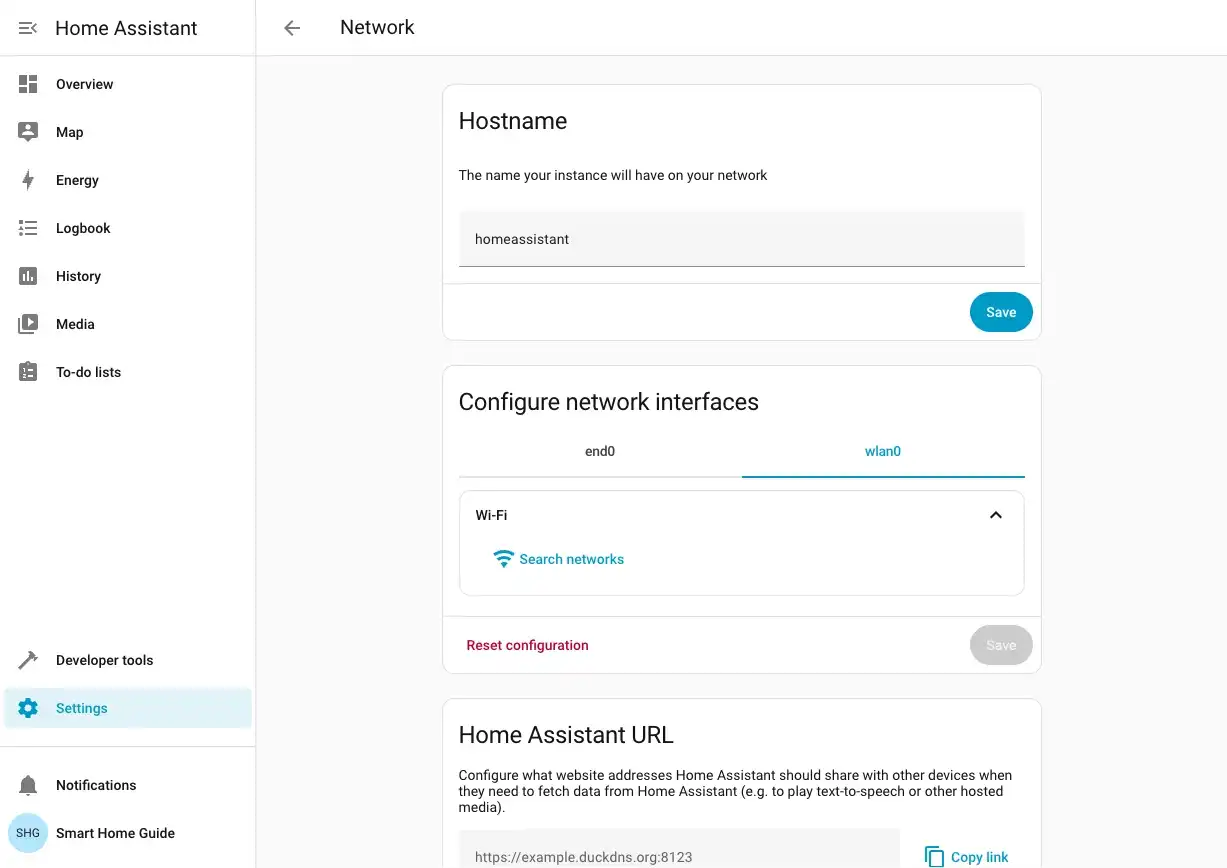
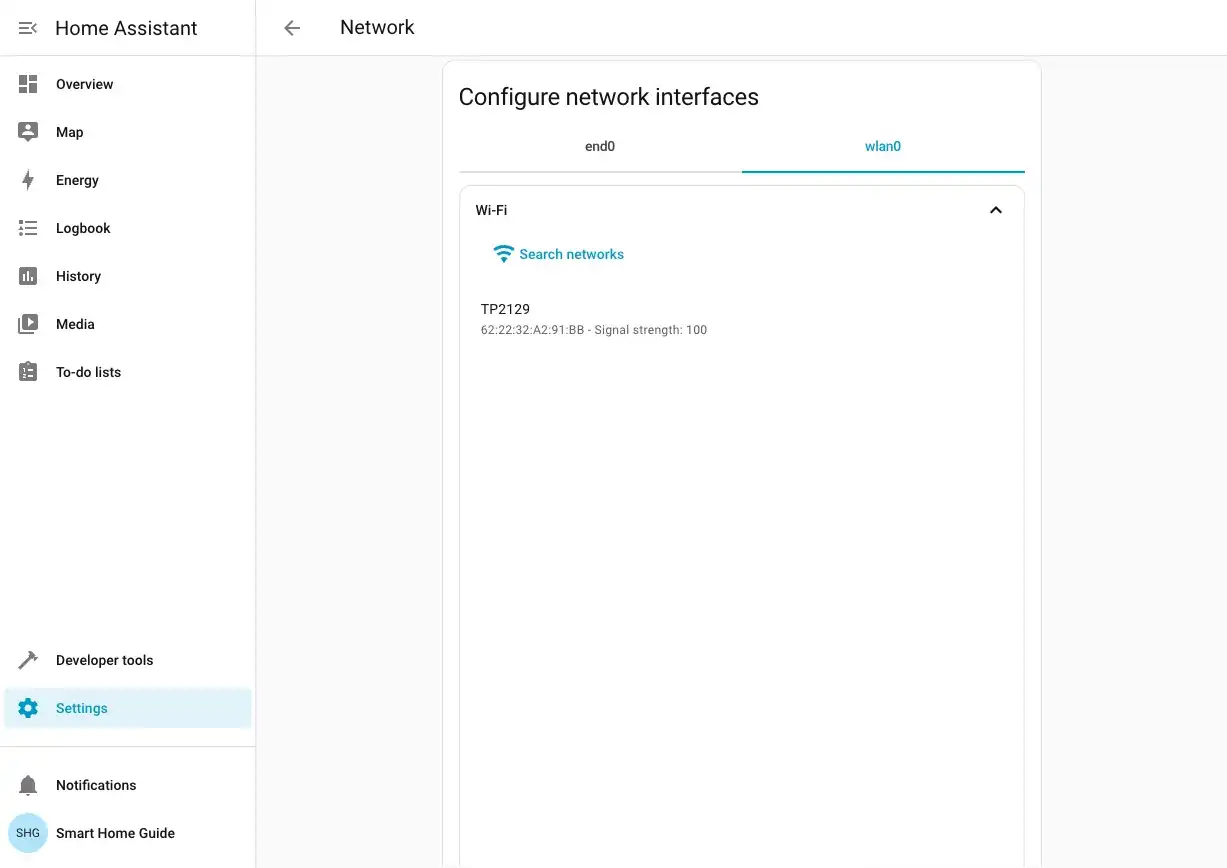
wlan0) from the list and click Configure.Click Search networks to scan for available WiFi networks.
Select your network from the list.
Choose your authentication method (WPA-PSK is the most popular) and enter your WiFi password.
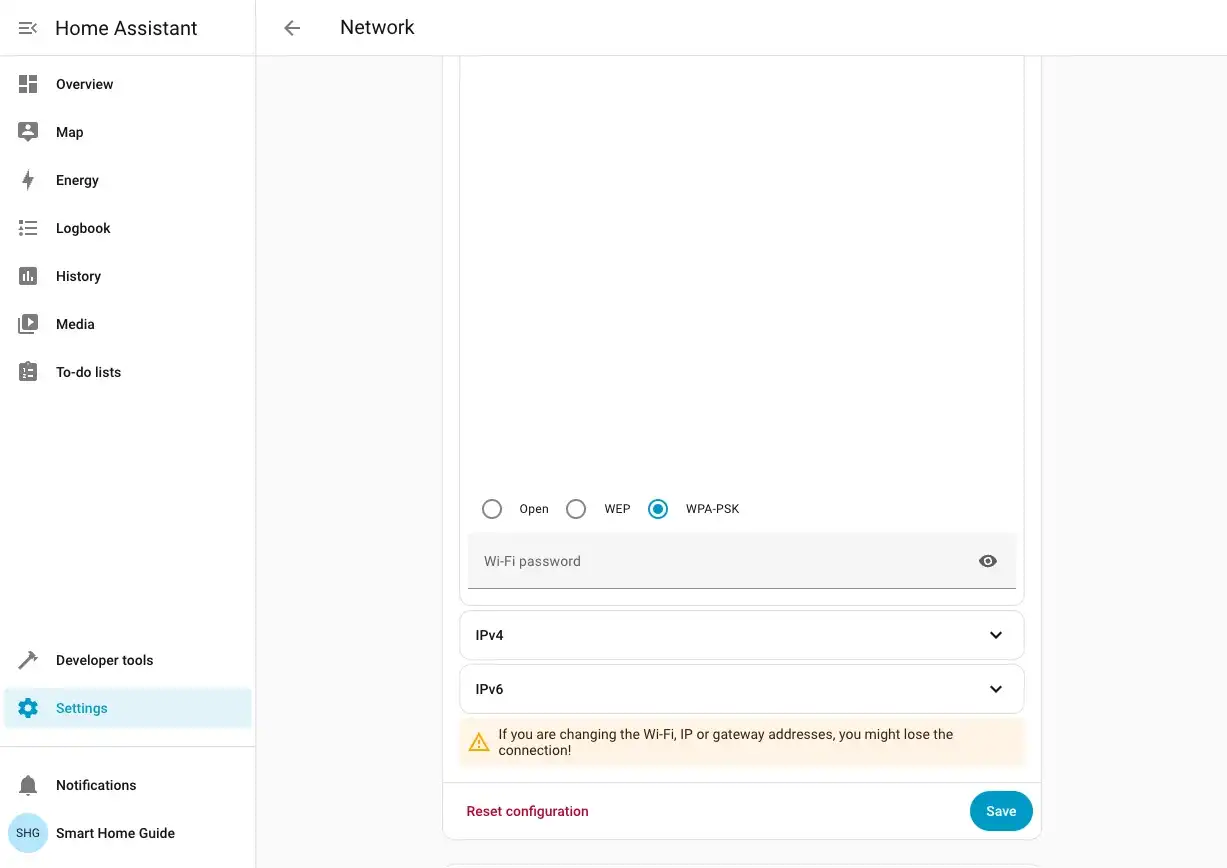
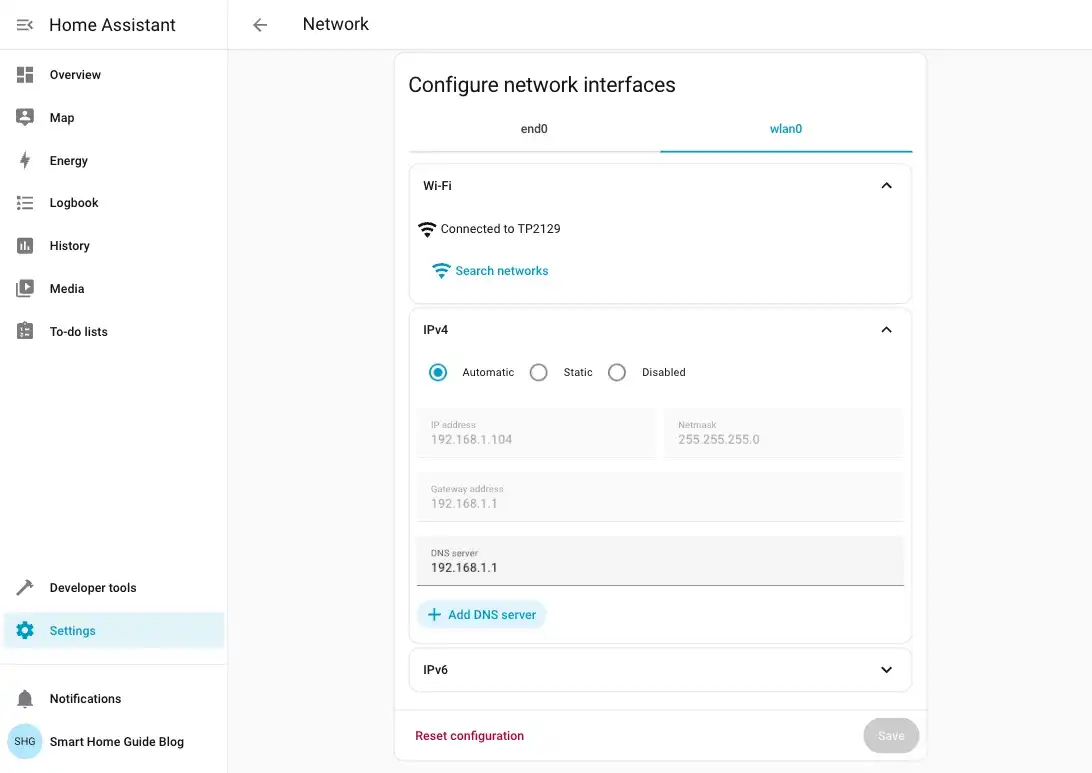
Choose how the IP is assigned:
- Automatic - DHCP, simplest, recommended.
- Static - set IP Address, Netmask, Gateway address, and DNS server so the IP never changes.
Click Save.
Wait up to a minute, then confirm that
wlan0shows Connected to ... with an IP under Settings → System → Network.
Tip: If you are migrating from Ethernet to WiFi, disconnect the Ethernet cable after you click Save to avoid route conflicts.
Troubleshooting Tips for Seamless Home Assistant WiFi Connectivity
- Check WiFi adapter: Ensure your WiFi interface (usually
wlan0) is recognized. - Scan available networks: Use the commands
nmcli device wifi rescanandnmcli device wifito list networks. - Retry connection: Use
nmcli device wifi connect "SSID" password "PASSWORD"to connect and generate a profile. - Verify IP assignment: Use
ip addr showto check your device’s IP address. - Static IP matching: If replacing Ethernet with WiFi, assign the same static IP to avoid integration issues.
Following these tips prevents many common connectivity issues and ensures your Home Assistant remains reliably connected to your home network.
Benefits of Proper WiFi Configuration for Home Assistant
Properly configuring WiFi in Home Assistant enables:
- Stable access to your smart home hub.
- Seamless communication with smart devices such as smart locks, thermostats, robot vacuums, and smart speakers.
- Improved reliability and response times for automation rules.
- Simplified troubleshooting and maintenance.
- Enhanced integration with voice assistants like Amazon Alexa and Google Assistant.
WiFi Optimization Tips for Home Assistant
A few small tweaks can make a big difference to stability and range:
- Prefer 2.4 GHz for low‑power sensors and switches; it travels farther through walls. Use 5 GHz for cameras or bandwidth‑heavy gear.
- Keep SSID names simple (letters and numbers). Avoid emojis and trailing spaces to prevent connection errors.
- On 2.4 GHz, set channel width to 20 MHz and choose channels 1, 6, or 11 to cut interference. On 5 GHz, pick non‑DFS channels if your devices struggle to connect after reboots.
- Aim for an RSSI stronger than -65 dBm where your Home Assistant host sits. Move the access point or add a mesh node if needed.
- Create a dedicated IoT network (guest/VLAN). Reserve DHCP leases for key devices and your Home Assistant host for consistent IPs.
- Disable MAC address randomization on phones/tablets used as presence sensors or for static reservations.
- If both Ethernet and WiFi are connected to Home Assistant, keep only one active to avoid route flapping.
After making changes, test from a phone next to your Home Assistant device, then reboot the host to ensure the new settings stick.
Summary Checklist for WiFi Setup Success
- Identify the WiFi interface (
wlan0or custom). - Enter the correct SSID and password, with quotes if necessary.
- Choose DHCP or configure a static IP.
- Use CLI commands or the Home Assistant UI for configuration.
- Test connectivity via
ip addrand the web interface. - Adjust network configuration in case of hardware changes.
By following these structured steps to configure WiFi in Home Assistant, you ensure a smooth and uninterrupted smart home experience.
With WiFi properly configured in Home Assistant, your smart home can operate flawlessly, letting you focus on enhancing your home's automation and convenience without worrying about connectivity interruptions.